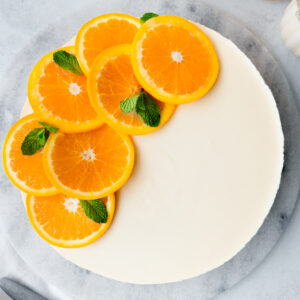
No Bake Orange Cheesecake (with jelly)
Made with a secret ingredient duo; orange jelly and sour cream. Gently wobbly, silky, creamy and light, this no-bake cheesecake is anything but traditional.
Special Equipment
- Food processor or resealable food bag + mallet or rolling pin + medium mixing bowl
- Small prep bowl + teaspoon
- 9 inch spring-form cake tin + baking paper
- Metal spoon
- Electric whisk + large mixing bowl
- Clingfilm
- Large open star nozzle + piping bag (if decorating with cream)
Ingredients
FOR THE CRUST
- 110 g salted butter
- 250 g digestive biscuits / graham crackers
FOR THE FILLING
- 135 g pack orange jelly cubes
- 180 ml boiling water
- 300 ml whipping cream / heavy whipping cream
- 300 ml sour cream
- 250 g Philadelphia Light Soft Cheese
- 125 g icing sugar / powdered sugar
- 1 teaspoon vanilla extract
TO DECORATE WITH ORANGE SLICES, OPTIONAL
- 2 oranges
- A little fresh mint
TO DECORATE WITH CREAM, OPTIONAL
- 300 ml whipping cream / heavy whipping cream
- Tin of mandarin segments in juice
Instructions
- Grease a 9 inch spring-form cake tin with butter and line the bottom. I like to cut out a circle a bit bigger than the tin which I can grip to pull the cheesecake gently off the cake tin base and onto a plate/cake stand.
- Add the biscuits/crackers to your food processor, breaking them up with your hands as you go. Whizz until you have crumbs. Alternatively, add to a food bag, seal and smash them up with a meat mallet or rolling pin until in crumbs.
- Put the butter a small bowl and microwave for 30 seconds (if butter is room temp, bit longer if it’s chilled), then stir until fully melted. Pour it into the biscuit crumbs either in the food processor and whizz to combine, or stir into the crumbs in a mixing bowl. Tip the biscuit crumb into the tin. Press it down firmly with the back of a metal spoon, creating an even layer over the bottom. Refrigerate while you carry out the next steps.
- Add the orange jelly cubes (separated) to a bowl and add 180ml of boiling kettle water (or if using Jell-O then add ¾ cup) and stir until dissolved. Set aside to cool a little while you do the next two steps, but don’t let it set.
- Beat the whipping cream in a large mixing bowl on a high speed until stiff peaks form.
- Then add in the icing/powdered sugar, then the cream cheese and vanilla extract. Beat on a medium speed until smooth and creamy.
- Next beat in the dissolved jelly/Jell-o on a medium speed until well combined.
- Then add in the sour cream and beat on a low speed until just combined.
- Pour the filling onto the crumb base in the tin. Level out with a silicone spatula if needed. Cover carefully with clingfilm/wrap, ensuring it doesn’t touch the top of the cheesecake now or when you remove it. Chill in the fridge for at least 6 hours. Leave it in the tin until ready to serve. If you are going to decorate it ahead of time, also do that while it’s still in the tin. When you do come to take it out, use a sharp knife to loosen the cheesecake round the edges before you release the clip. Slide it off the base very carefully and slowly, grabbing onto the baking paper and use a cake spatula if needed.
TO DECORATE (OPTIONAL)
- First drain your mandarins well, this can be done earlier in the day. Then blot any excess liquid away with paper towel. You want to select the smallest firmest segments to decorate with.
- Pour the whipping cream into a medium mixing bowl and beat on a high speed until stiff peaks form. Then add the nozzle to your piping bag, push it down as far as it will go, judge where you need to snip open the piping bag from this, then shift the nozzle back up a little and cut open a hole for the nozzle to then be pushed half out of, ensuring the larger end sits securely in the bag still. Add the cream to your piping bag and pipe rosettes, with a little gap in between each, all the way round the edge of the cheesecake. Carefully top each rosette with a mandarin segment. See video for help.
Notes
Keep refrigerated for up to 3 days.
You can freeze it, just defrost in the fridge over night.
If making in the UK with jelly cubes, you can add in a few drops of natural orange food colouring when you add the jelly to give the filling an orange tint.
Nutrition - per serving
Calories: 501kcalCarbohydrates: 40gProtein: 6gFat: 36gSaturated Fat: 21gPolyunsaturated Fat: 2gMonounsaturated Fat: 10gTrans Fat: 1gCholesterol: 112mgSodium: 355mgPotassium: 156mgFiber: 1gSugar: 28gVitamin A: 1235IUVitamin C: 1mgCalcium: 99mgIron: 1mg
Made this recipe?Leave a rating & comment at the bottom of this page! If you’ve printed this recipe, scan the QR code below to get back to it quickly online. You could also post a picture on Instagram and tag @kidfriendlyfamilymeals to share it with me.

