
These chocolate Halloween biscuits are such a fun and easy Halloween bake for the whole family. The chocolate biscuit dough is made in the food processor, so there's no complicated creaming or special baking skills needed. Simply roll it out, cut out your favourite Halloween shapes and bake!
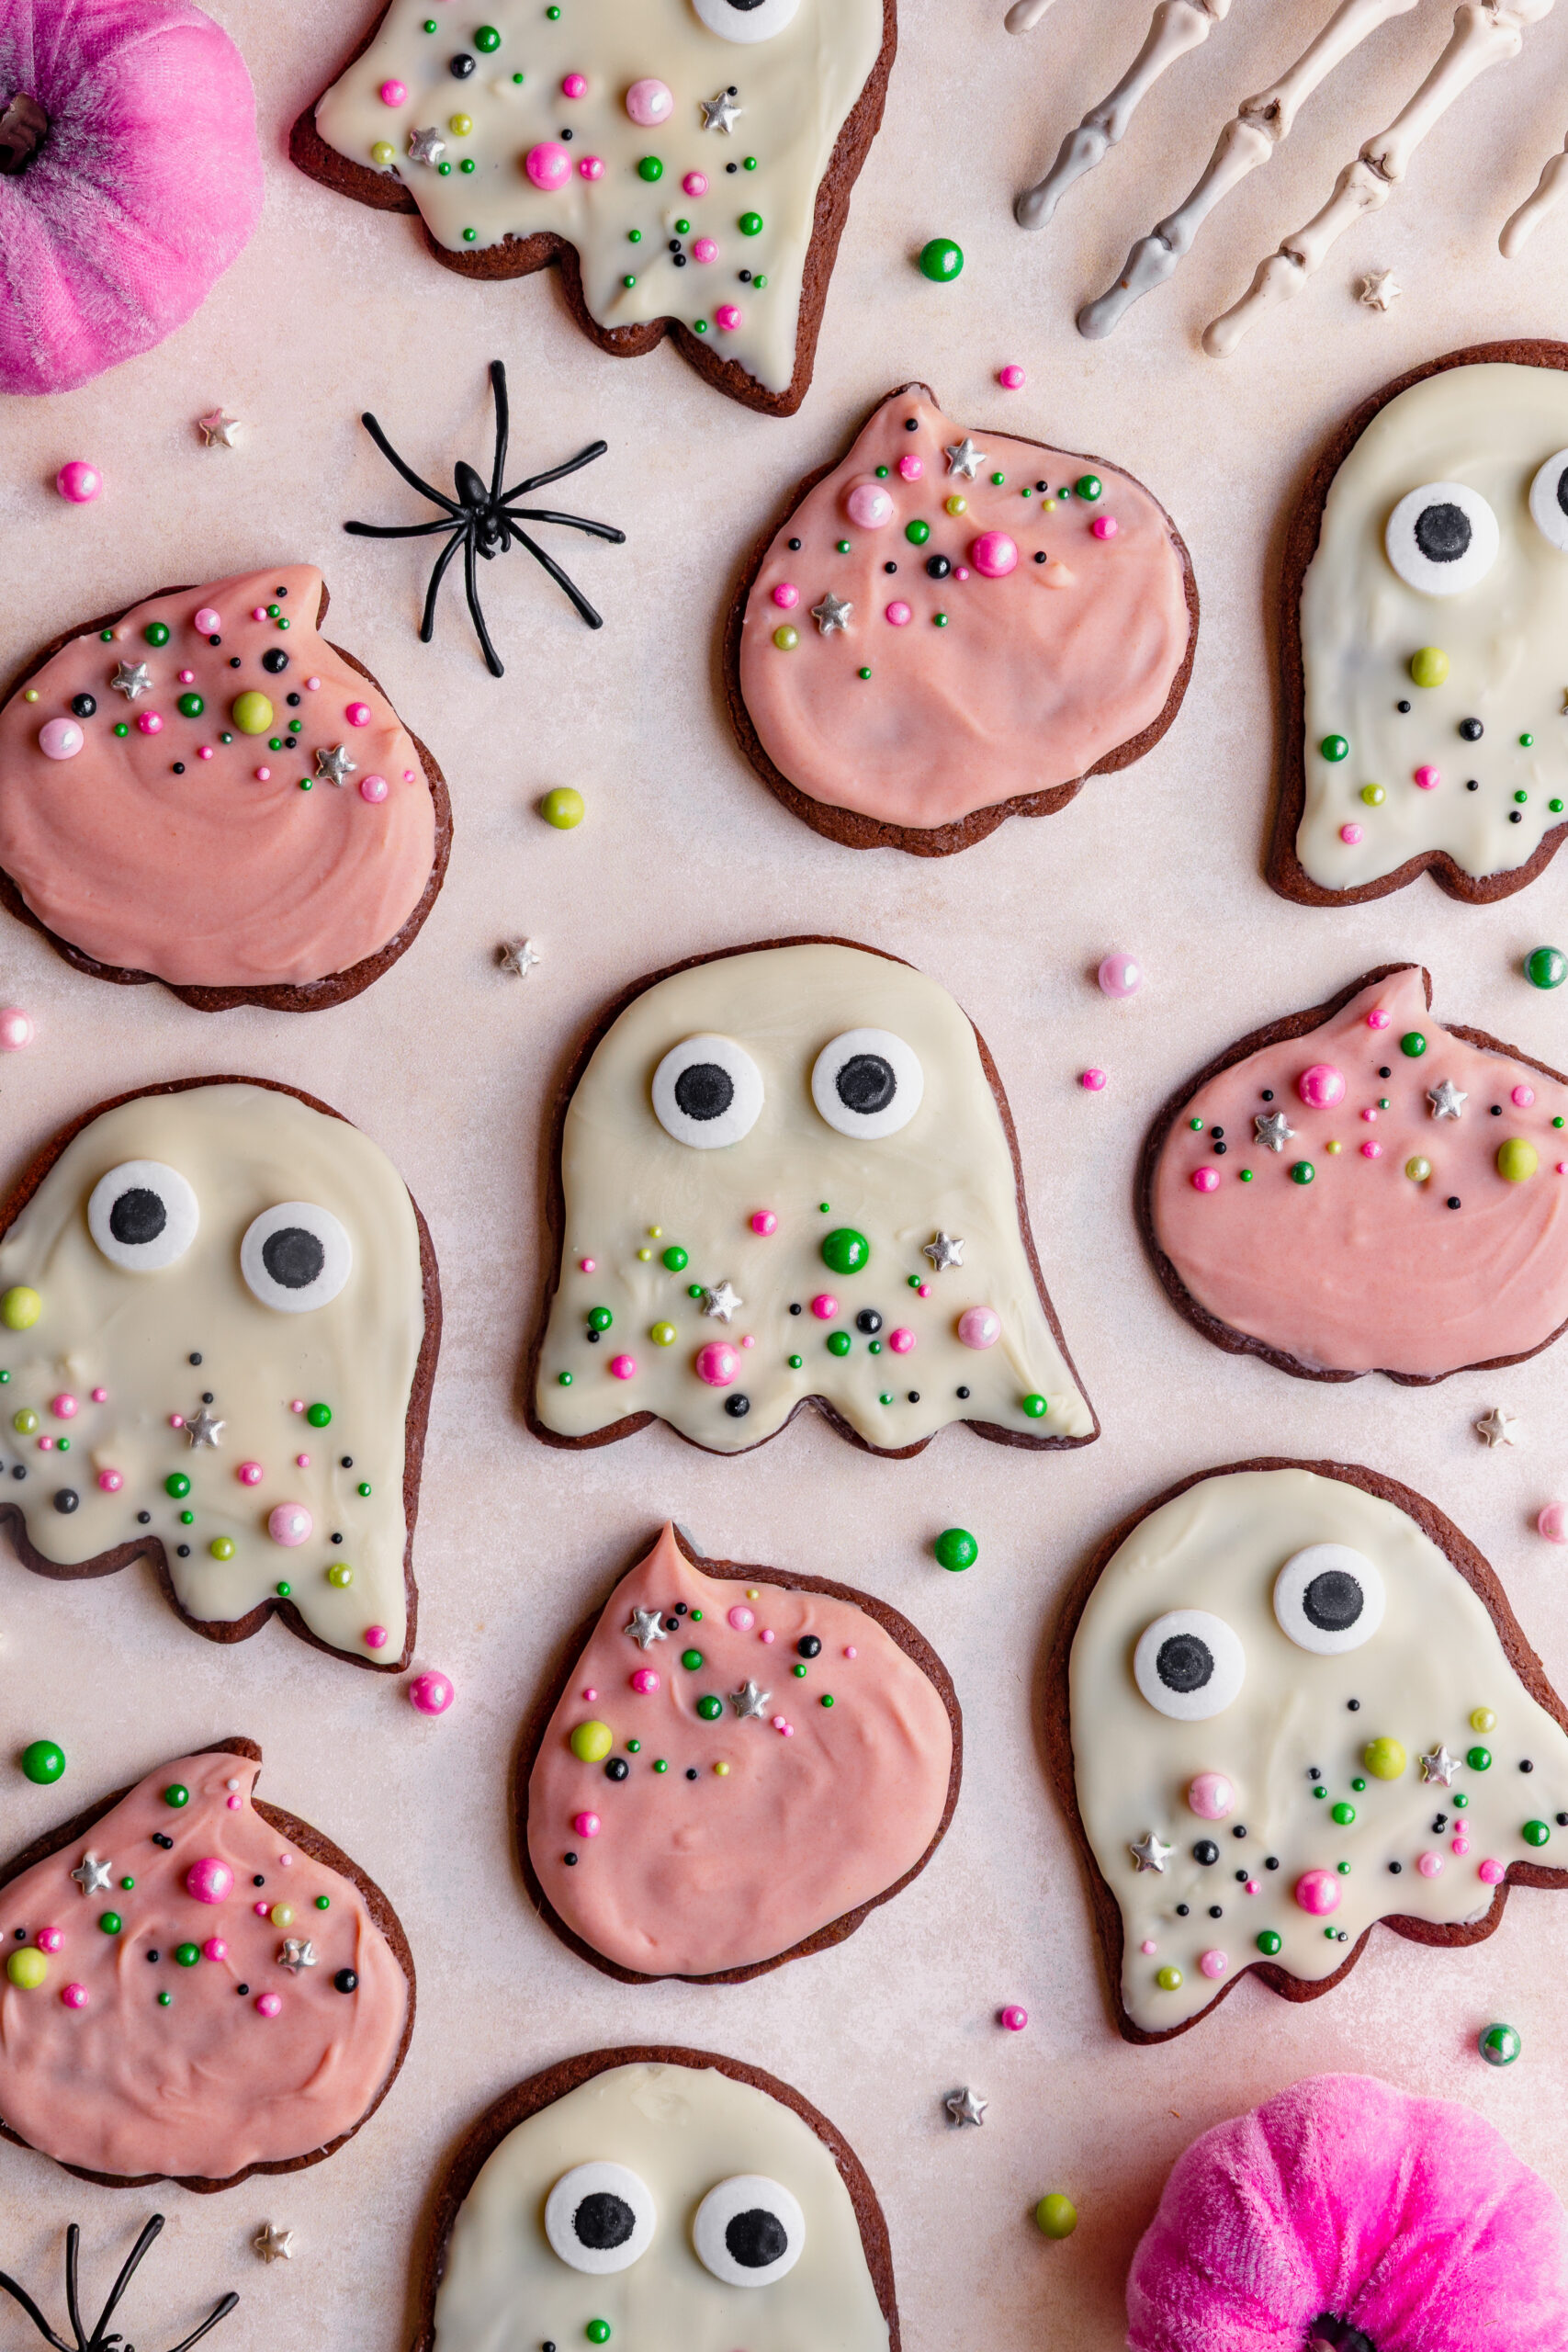
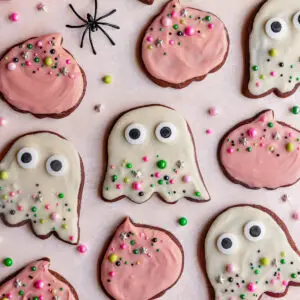
I've kept the decorating just as simple. There are no fancy piping techniques here - the biscuits are topped with melted white chocolate, spread on with the back of a spoon, then finished with sprinkles and edible googly eyes. I used pumpkin and ghost cutters, but you can use any Halloween-shaped cutters you have.
This is a great recipe to make with the kids, too. They can help cut out the shapes and, once the biscuits have cooled, have lots of fun decorating them with different coloured sprinkles and edible eyes. They're perfect for a Halloween party, school bake sale or simply making together in the run-up to Halloween. This is a family recipe that's designed to be easy, fun and achievable for everyone.
Why you'll love this recipe
These Chocolate Halloween Biscuits are…
- Easy to make - the biscuit dough comes together quickly in a food processor, making this a really simple recipe even if you're new to baking.
- No fancy decorating skills needed - there's no piping or complicated techniques. simply spread melted white chocolate over the biscuits with the back of a spoon, then add your sprinkles and edible eyes.
- Great for kids to help with - kids can get involved with rolling and cutting out the dough, then have lots of fun decorating the cooled biscuits.
- Easily customised - use whatever halloween cutters, sprinkles and food colouring you have. make pumpkins orange, bats black or witches green - there are lots of ways to make them your own.
- Perfect for halloween - these make a fun homemade halloween treat for parties, bake sales, school treats or simply enjoying at home.
- Make them ahead - the biscuits can be made in advance and are also freezable, making them handy when you want to get some halloween baking done ahead of time.
GIFTING HALLOWEEN BISCUITS
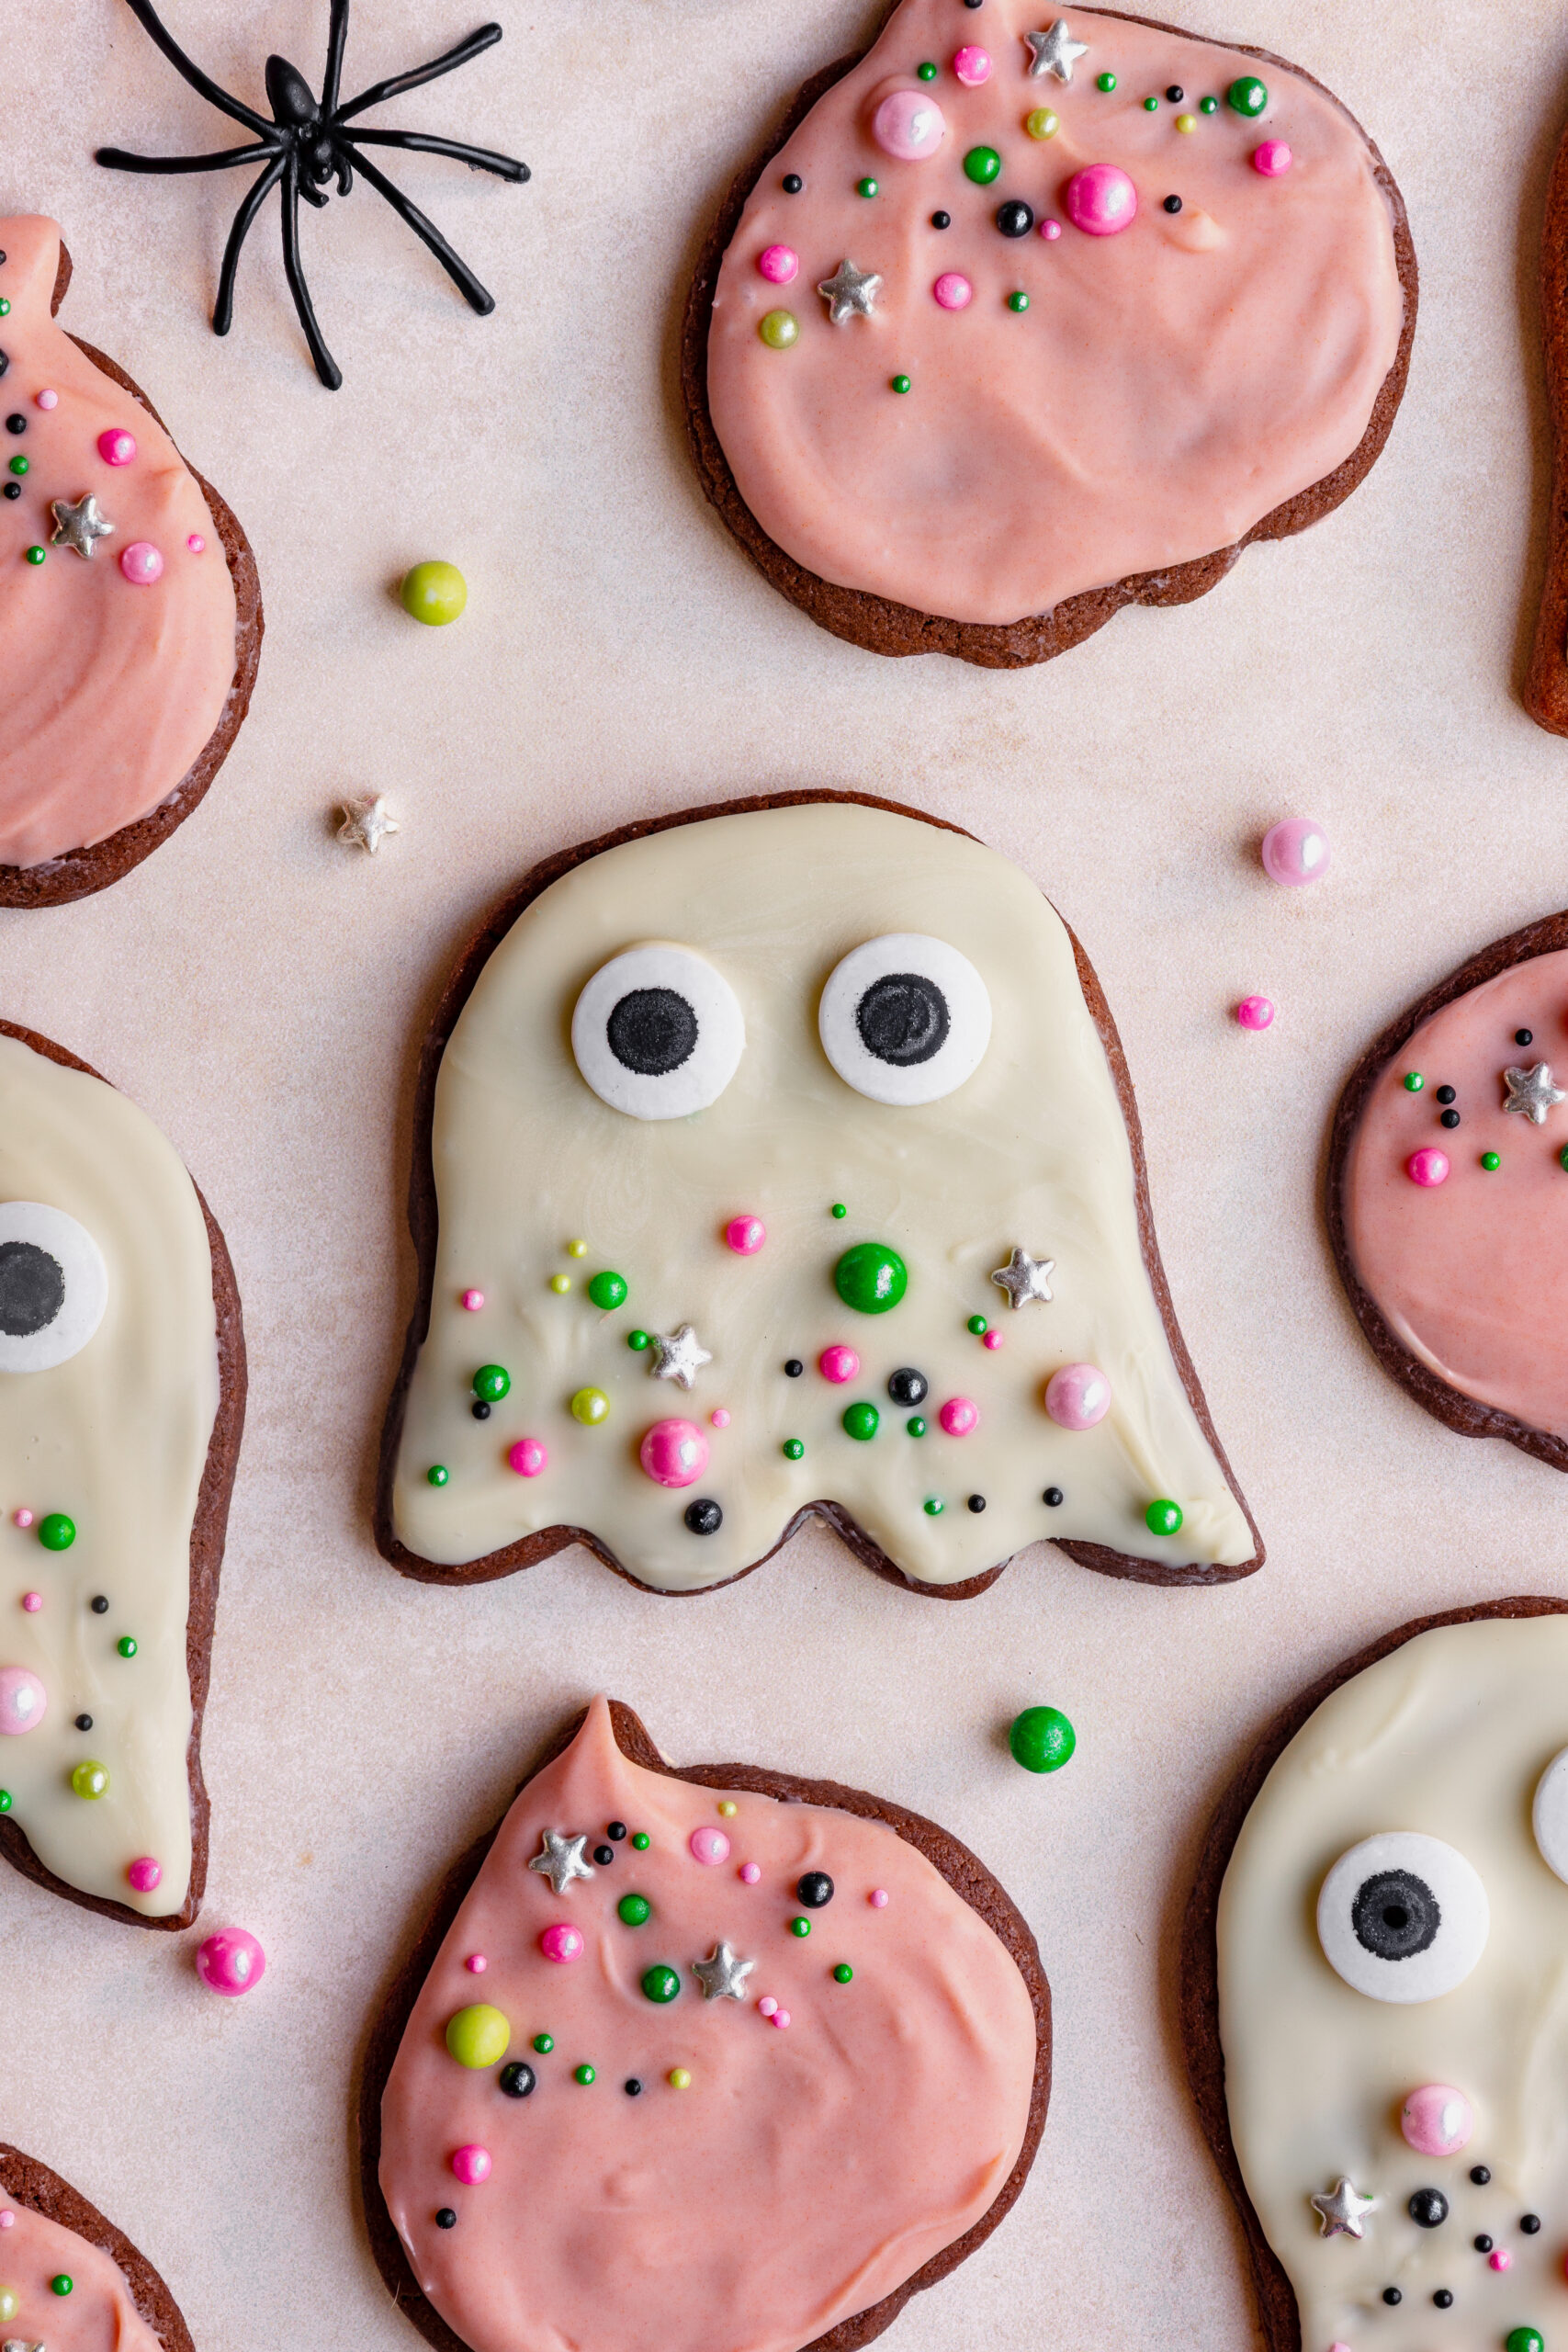
These chocolate Halloween biscuits make a really fun homemade gift. If you use a larger cookie cutter, like my ghost cutter, you can pop one decorated biscuit into a small cellophane food bag and tie it with a ribbon or Halloween-coloured twist tie.
They're perfect for handing out to friends, neighbours or children who come to the door at Halloween. You could also make a batch to give to family, add them to Halloween party bags or take them along to a Halloween get-together.
Tips For Making The Best Chocolate Halloween Biscuits
- Make sure your butter is at room temperature so it combines easily with the dry ingredients.
- Don't skip the chilling time as it makes the dough much easier to handle, and will stop the shapes breaking up as you transfer the dough to the baking trays.
- Roll the dough evenly to around 3mm thick (£1 coin) so the biscuits bake evenly.
- Don't over bake the biscuits. They should be just set and no longer look wet.
- Allow the biscuits to cool completely before decorating.
- Melt the white chocolate exactly as the recipe states, white chocolate seizes easily!
- Always use gel food colouring for the white chocolate, not liquid colouring, again this will stop it seizing.
- Add the eyes and sprinkles immediately after spreading on the chocolate each biscuit in turn, before it starts to set.
- Give the decorated biscuits at least 30 minutes to set in the fridge before storing them.
FAQS for my Chocolate Halloween Biscuits
Self-raising flour - This forms the main structure of the biscuits and helps them rise slightly as they bake. If you only have plain flour, you can use it with 1 teaspoon baking powder, although self-raising flour is the easiest option here.
Cornflour - Cornflour (or cornstarch) helps give these biscuits a softer, more delicate texture rather than making them too firm or crunchy.
Cocoa powder - Cocoa powder gives the biscuits their chocolate flavour and lovely dark colour, which works particularly well with the Halloween decorations. Use unsweetened cocoa powder rather than drinking chocolate powder.
Salt - Just a small pinch helps bring out the chocolate flavour and balances the sweetness. You can leave it out if needed, although I recommend keeping it in.
Unsalted butter - Butter gives the biscuits their rich flavour and helps create a tender, crumbly texture. Use it at room temperature so it combines easily with the dry ingredients. You can use a block-style baking margarine instead, although the flavour and texture may be slightly different.
Light brown sugar - Brown sugar adds sweetness while also giving the biscuits a slightly softer texture and subtle caramel flavour. You can substitute it with caster sugar if needed, although the finished biscuits will be a little different in flavour and texture. You can also substitute it with dark brown sugar, this will give the biscuits caramel notes.
Cinnamon - Cinnamon adds a gentle warmth that works really well with the chocolate. You can leave it out if you're not a fan, or replace it with a little mixed spice or pumpkin spice.
Egg yolks - Egg yolks help bind the dough together while adding richness and helping to give the biscuits a tender texture. I haven't tested an egg substitute in this particular recipe, so I wouldn't recommend simply swapping them without adjusting the recipe.
Milk - Just a small amount of milk helps bring the dough together and gives you the right consistency for rolling. Whole or semi-skimmed milk will work, and you could use a dairy-free milk alternative if needed.
White chocolate - This forms the simple coating for the biscuits and provides a sweet contrast to the chocolate biscuit underneath. Choose a good-quality white chocolate that melts smoothly, and this is an important one DO NOT USE white chocolate chips. These do not melt in the microwave like dark or milk chocolate chips do. They will instantly seize. Only use a bar of white chocolate, broken up into pieces. White chocolate is finicky when melted in the microwave so ensure you are following my recipe instructions.
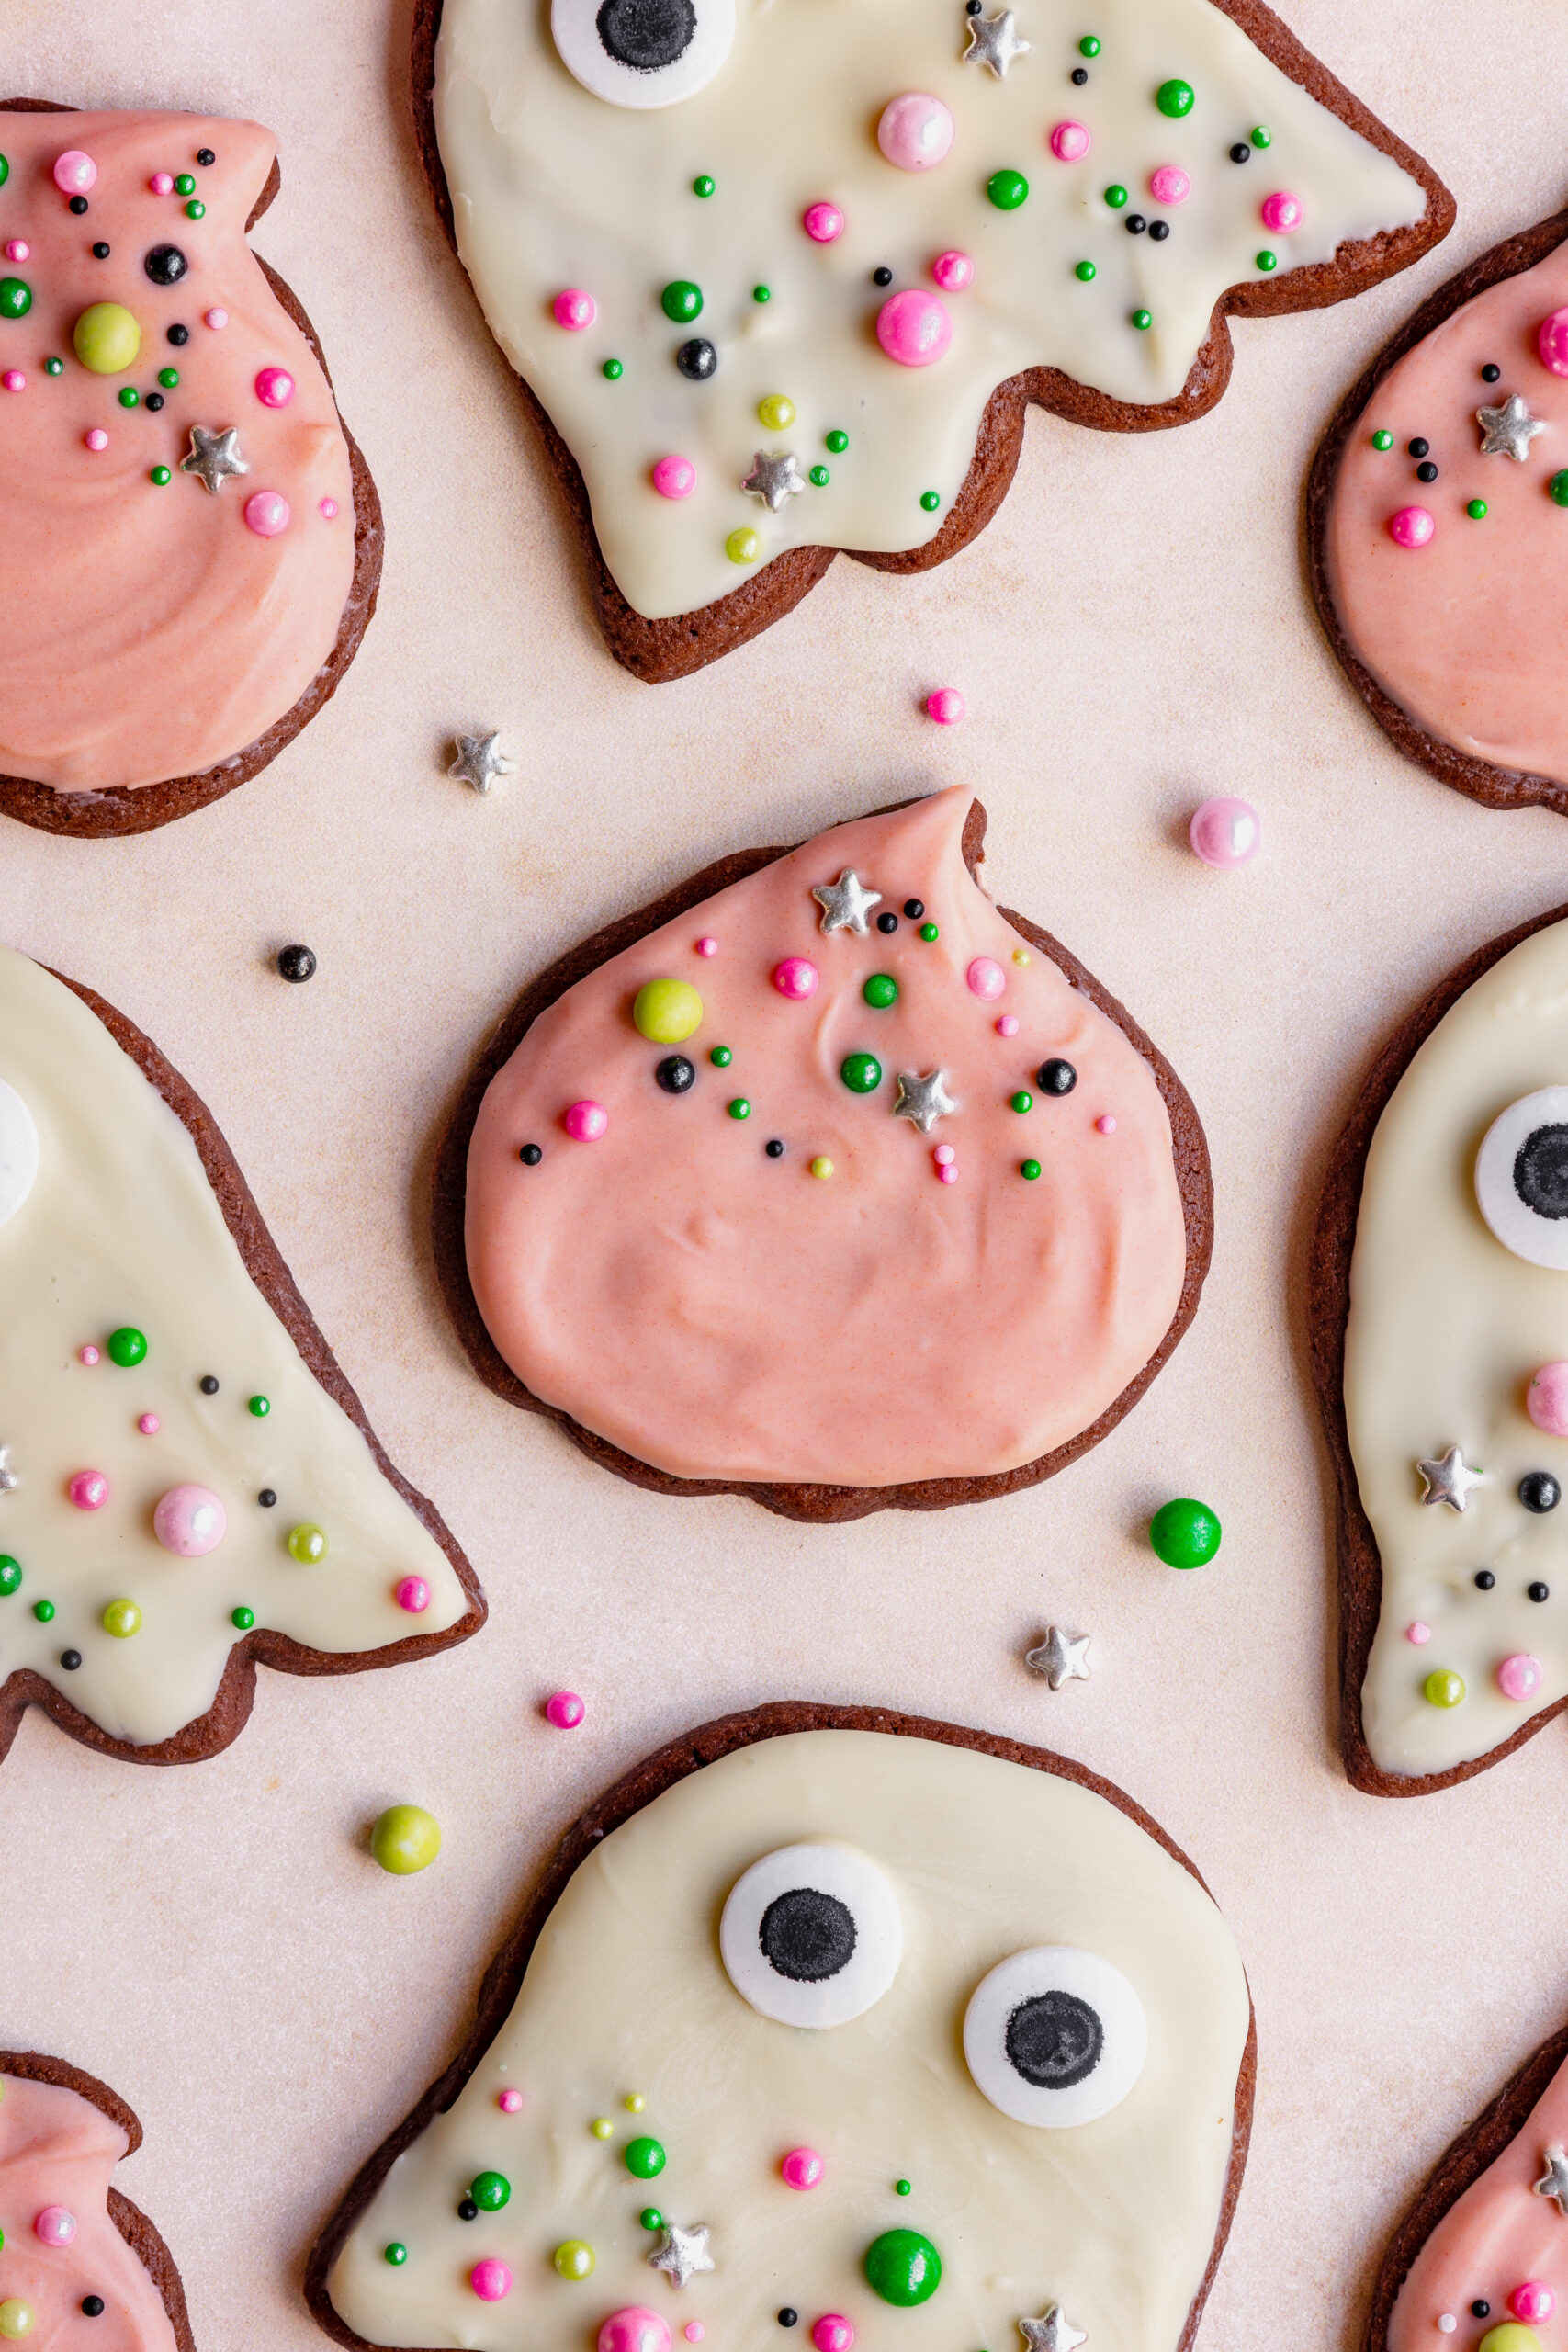
Food colouring gel - If you want to colour all or half of the white chocolate, go for gel food colouring. It's important to use gel rather than liquid food colouring, as liquid colouring can cause white chocolate to seize. Choose colours that match your Halloween cookie cutters. So for mine I did ghosts which I left white and pumpkins which I wanted to be a peachy colour so I used a few drops of an orange gel food colouring. I had plus a few drops of a pink food colouring I had. Go for colours that make sense for your cutters, for example, if you had bat shape, then go for a black food colouring.
Halloween sprinkles - These add colour, texture and plenty of Halloween fun without requiring any complicated decorating. You can use any Halloween themed sprinkles you like or suitably spooky colours. My daughter loves girlie colours so this time I went for pink, green and black sprinkles, which are actually Wicked themed sprinkles. In the past I have used purple, green and black sprinkles. I always buy these from Amazon.
Jumbo edible googly eyes - These edible eyes turn the biscuits into fun little Halloween characters and are especially popular with kids. You can leave them off or use smaller edible eyes if that fits better with your cutters - especially if they are on the smaller side. Be careful about giving biscuits with edible eyes to little ones, always check the packaging for ingredients and age suitability - you may need to leave the edible eyes off theirs.
Halloween cookie cutters - You'll need Halloween-shaped cutters to create the biscuits. I used a pumpkin cutter from a set and a large ghost cutter, but bats, cats, witches' hats, spiders or any other Halloween shapes will work too. Just remember that the size of your cutters will affect how many biscuits you get, plus if using edible eyes, which size to get.
Yes. The dough can be made by hand, it will take longer and is harder work this way however. Add the flour, cornflour, cocoa powder, cinnamon, salt and butter to a bowl and rub the butter into the dry ingredients with your fingertips. Then mix in the sugar, egg yolks and milk until you have a dough.
Chilling firms up the butter in the dough, making it much easier to cut out the Halloween shapes, and lift them onto the baking tray. Otherwise they may break apart as you're trying to do so, especially if your kitchen is warm. It also helps the biscuits hold their shape during baking.
Roll the dough to roughly the thickness of a £1 coin, which is about 3mm. Try to keep the thickness as even as possible so the biscuits bake evenly.
Absolutely. I used a pumpkin cutter and a large ghost cutter, but the biscuit dough works with any Halloween-shaped cookie cutters. You could use bats, witches' hats, cats, spiders or whatever shapes you have. Just bear in mind that very small or intricate cutters may need slightly less baking time. Also if you'd like to add edible eyes, the size of the cutter will effect the size of the edible eyes you need.
Making sure you chill the rolled out dough is the best way to make sure they don't break when you transfer them onto the baking tray. So long as the dough is chilled and firm it should be okay. Once the shapes are cut, use a cake slice or metal turner to carefully lift them onto the lined baking trays.
Yes. I've done it before when I have been short on time. Around 12-15 minutes in the freezer should be enough to firm up the rolled-out dough. Keep an eye on it as you don't want it to freeze solid and then be unable to cut your shapes until it defrosts.
The recipe makes approximately 12-16 biscuits, depending on the size of your Halloween cookie cutters. Larger cutters will give you fewer biscuits, while smaller cutters will give you more.
Absolutely! You don't need to use the same decorations or shapes that I have used. The great thing about these biscuits is that you can adapt them to whatever Halloween cutters and decorations you have.
For example, if you have a bat-shaped cutter, you could colour the white chocolate black using black gel food colouring, then add Halloween sprinkles over all or just part of the chocolate. For witches, you could use green gel food colouring, or choose another colour you like. You also don't need to use edible googly eyes - they're just a fun extra if they work. You can leave them off completely, use different sprinkles, or decorate each shape differently.
Use a gel food colouring rather than liquid food colouring. Liquid colouring can cause melted white chocolate to seize and become thick and grainy. Add the gel a little at a time and mix well until you have your desired shade.
Yes. Use whatever Halloween shades you like! I made my pumpkins more of a peachy colour by mixing a little orange food colouring and a little pink food colouring in, but by all means if you have a pumpkin cutter go for just orange. you can try and match your white chocolate to your cutter shape, or use any Halloween colours you like and just have fun with it! Use a suitable gel food colouring to make the white chocolate any Halloween colour you like.
Yes, they make a great recipe to make with kids. They can help roll and cut out the dough, and decorating is particularly fun. For younger children, an adult should handle the oven, hot baking trays and melted chocolate.
Once the biscuits are completely cool, spoon melted white chocolate over each biscuit and use the back of the spoon to gently spread it almost to the edges. Add the edible eyes and sprinkles straight away while the chocolate is still wet so they stick in place. You don't need any piping bags or decorating skills, which is one of the things I love about these biscuits!
Yes, but bear in mind these biscuits are best eaten within 3 days of making. You could make the biscuits the day before you want to decorate them if you're not going to have time to do it all in one day. Once decorated, allow the chocolate to set completely on trays or cooling racks in the fridge for around half an hour, before then storing them in an airtight container in the fridge.
Once you've decorated the biscuits, you'll transfer them on racks or trays to the fridge for around 30 minutes to set the white chocolate. Once completely set, you can then transfer the biscuits to an airtight container or resealable food bag and store at room temperature (only if your kitchen is cool!), or in the fridge. You can baking paper between layers if you are stacking them to help protect the decoration. These Chocolate Halloween Biscuits are best eaten within 3 days.
Read more on safe food storage a home >
They are best enjoyed within a few days, but will keep for several days when stored correctly in an airtight container in the fridge.
These biscuits contain wheat/gluten, egg and milk/dairy.
There are no nuts in the biscuit recipe or decoration ingredients as written, so these chocolate Halloween biscuits can be suitable for people with nut allergies. However, check the packaging of your white chocolate, sprinkles, edible googly eyes and food colouring for allergy information, as some products may contain nuts or have a "may contain nuts" warning due to manufacturing processes. If you're making these for someone with a serious nut allergy, use ingredients that are specifically confirmed as suitable and avoid cross-contamination during preparation.
These biscuits should be ok for vegetarians, but check the ingredients of your white chocolate, sprinkles and edible googly eyes, as some decorating products may contain animal-derived ingredients.
You might like these…

Together to Eat is reader-supported. I may earn a small commission from anything bought through links found here.
Chocolate Halloween Biscuits
Special Equipment
Ingredients
- 200 g self raising flour
- 2 tablespoon cornflour
- 11 g cocoa powder
- Pinch of salt
- 110 g unsalted butter, at room temperature
- ½ teaspoon cinnamon
- 100 g light brown sugar
- 2 egg yolks
- 2 teaspoon milk
FOR THE DECORATION
Instructions
- Add the flour, cornflour, cocoa powder, cinnamon, salt and butter to your food processor and whizz until very well combined - use 'mix' function if have one. Alternatively, add all to a mixing bowl and rub the butter into the dry ingredients using your finger tips.
- Add in the sugar, egg yolks and milk and whizz again until a ball of dough forms, scraping the bowl down as needed. Alternatively, add to the mixing bowl and stir in until a dough forms, you may need to work it with your hands a little too.
- Shape it into a ball and then put the dough between 2 sheets of baking paper. Roll out until it's roughly the thickness of around a £1 coin (3mm). Carefully slide onto a large chopping board and replace the top sheet of baking paper with clingfilm. Transfer to the fridge. Chill for 30 minutes (or 12 minutes in the freezer ought to do it).
- In the meantime, preheat the oven to 200ºc/180ºc fan/400ºf/gas 6. Line 2-3 baking sheets with baking paper.
- Once the dough has chilled, using your cookie cutters, cut out your Halloween shapes. Carefully transfer to the baking trays, leaving about an inch gap between each for spreading.
- Bake for 7-8 minutes in the middle and bottom of the oven, until just dry. Leave to cool for 15-20 minutes, until hardened, then transfer to wire racks using a cake slice or metal turner.
FOR THE DECORATION
- Once completely cool, it's time to decorate! Add the white chocolate to a bowl breaking it up into pieces as you go. If decorating in two different colours, divide the chocolate into 2 bowls. Microwave the broken up chocolate in a heat proof bowl first for 30 seconds, then stir and microwave in 20 seconds increments, stirring after each burst until fully melted. Do not over heat, white chocolate seizes very easily! Add a few drops of gel food colouring to the melted white chocolate and stir in well. Add more if needed.
- Work your way round the biscuits, one at a time, adding a spoonful of melted chocolate to biscuits. Use the back of the spoon to spread the chocolate, almost all the way up to the edges.
- Immediately add the sprinkles and edible eyes if using, to biscuit, before the chocolate starts to set. I like to add the sprinkles to just the top or bottom half of the biscuits.
- Then transfer the biscuits carefully on the wire racks to the fridge for at least 30 mins to set the chocolate. After, they can then be stored in an air tight container in the fridge or at room temperature if the kitchen is cool.
Notes
Nutrition - per serving



Comments
No Comments