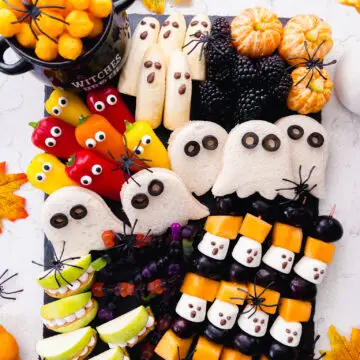
Let your creativity flow and wow the kids with a spooky snack board, full of cute Halloween ghouls. And if an entire snack board is more than you can handle - no problem, choose your favourite Halloween themed snack or two from the board and just go with that. I WITCH you a Happy Halloween!
- WATCH THE VIDEO -
If you're looking for halloween recipes for kids, watch the video to get a feel for each element. You may want to make them all, or just pick out your favourite one or two.
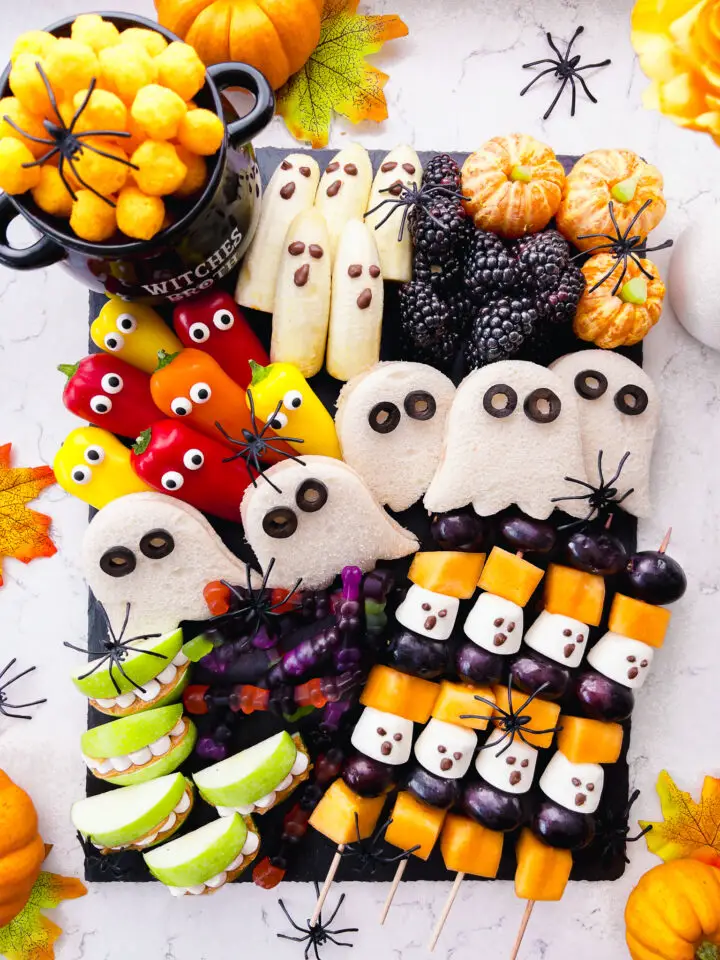
What's in the Halloween Snack Board for Kids?
There are six different Halloween snack ideas for kids included in this snack board. I recommend making most of the snack elements in advance and then chilling until ready to compile your board. However, I don't recommend making the banana ghosts and the zombie apple mouths until just before you are ready to serve because they will slowly start to go brown.
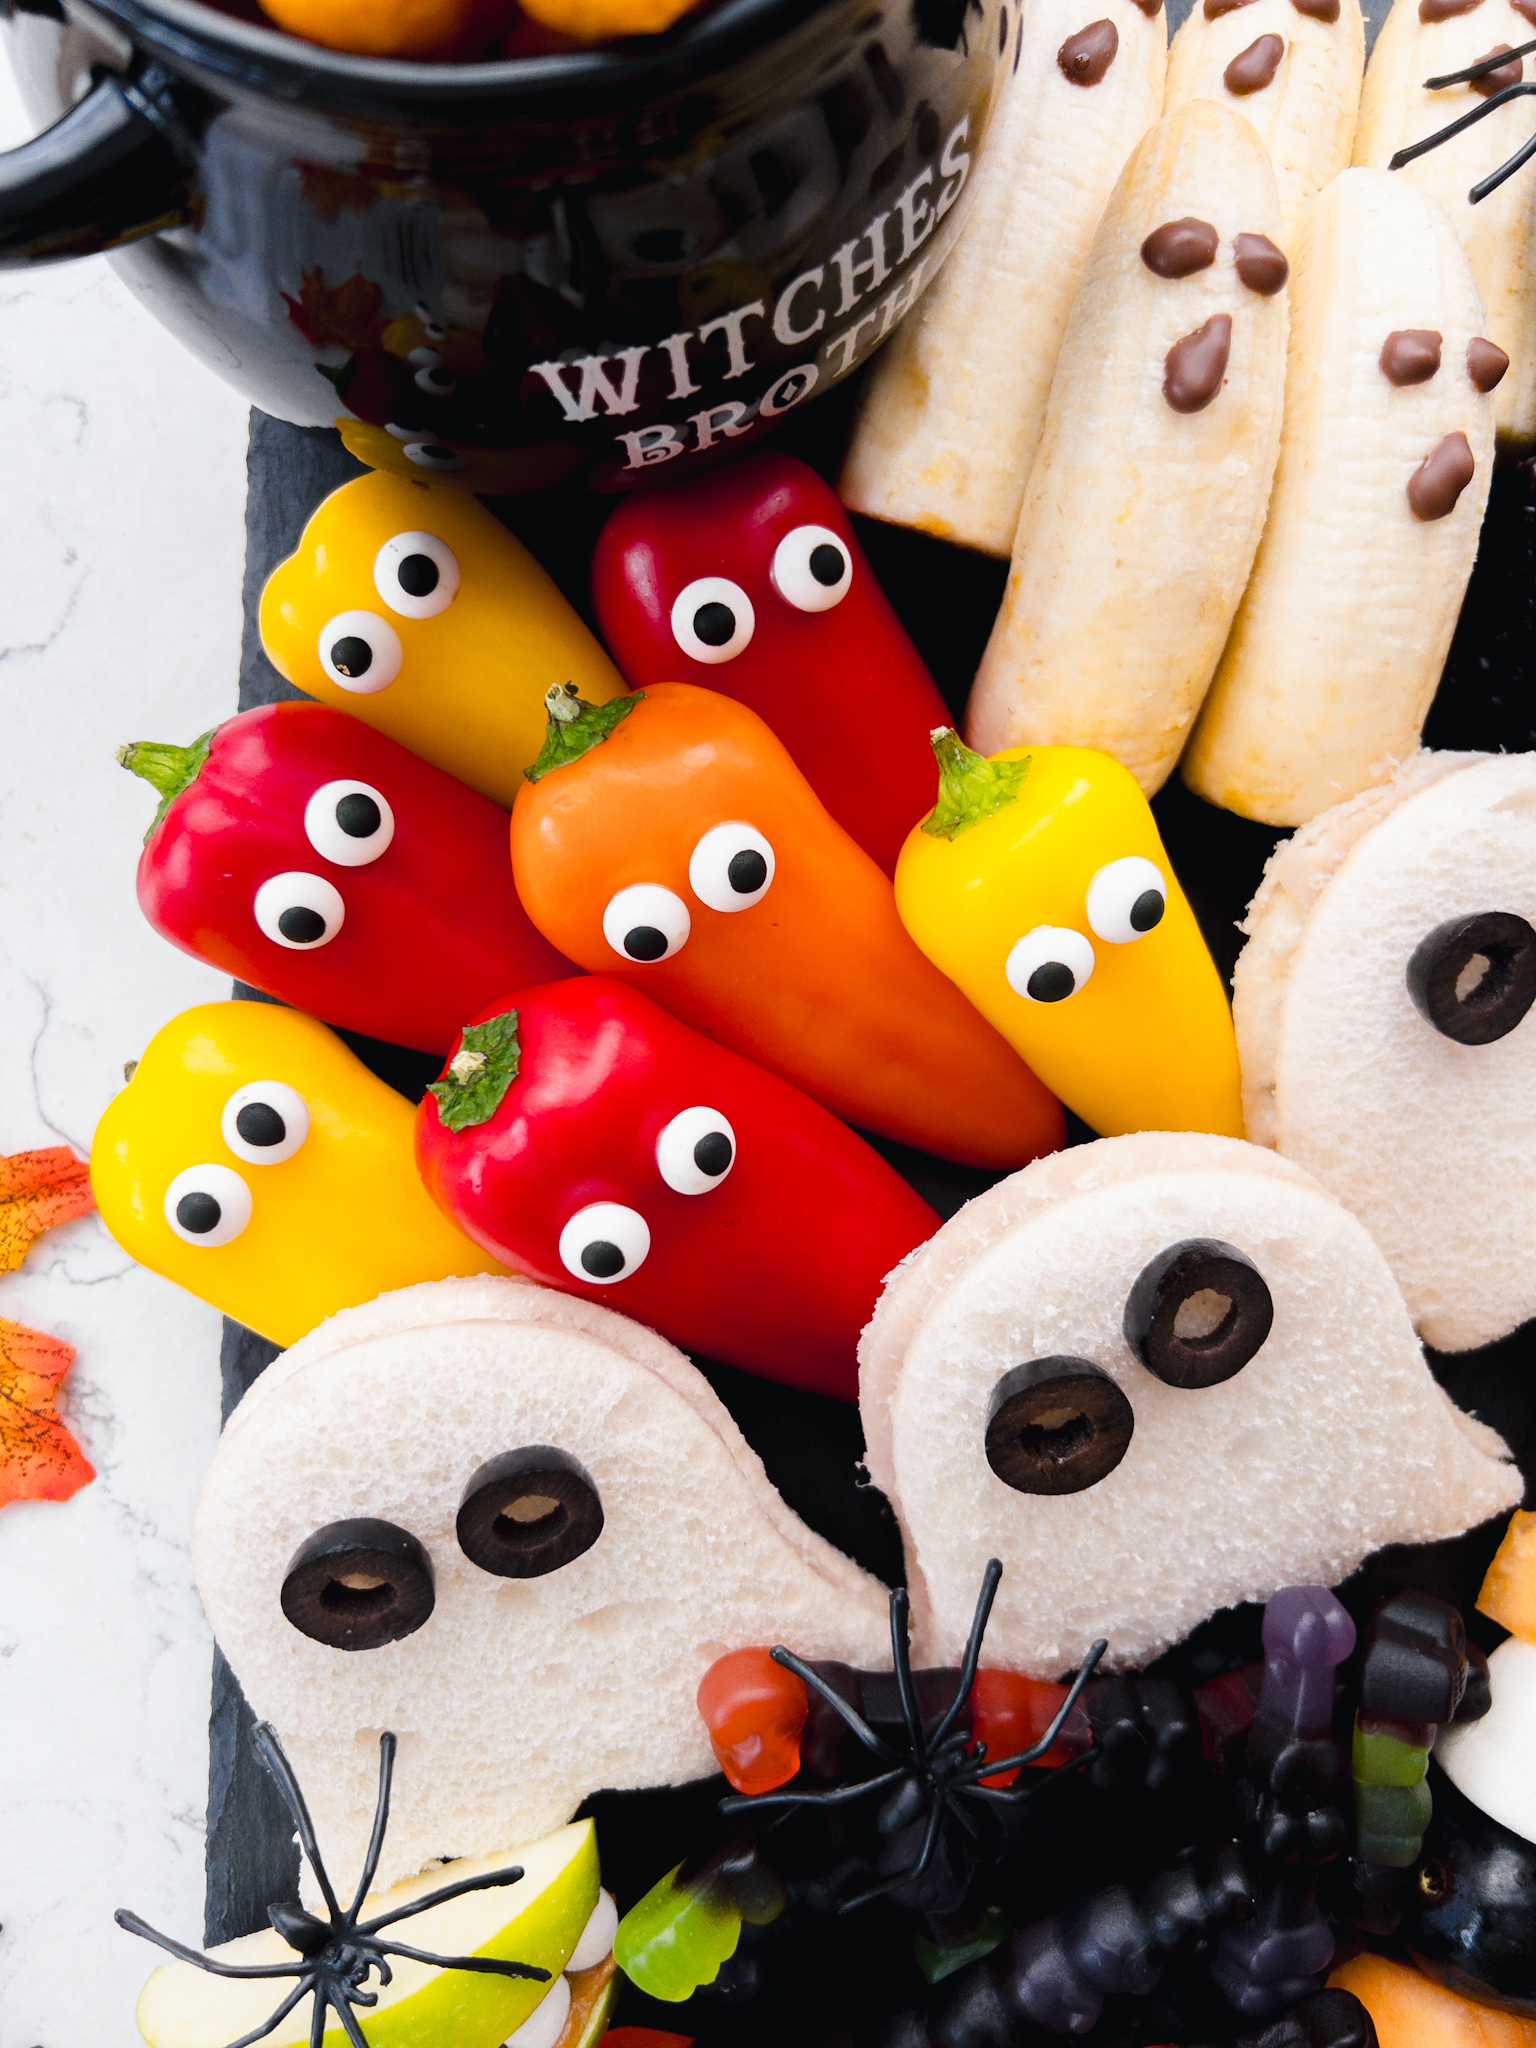
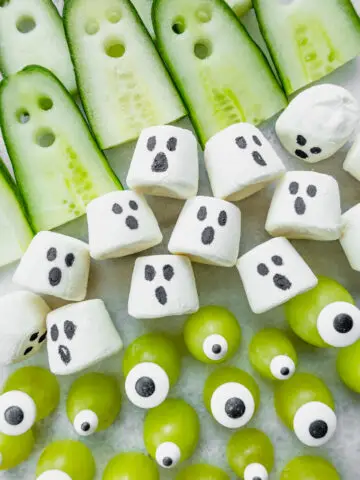
Mini Sweet Pepper Ghosts
For these super sweet and crunchy ghosts you will need a pack of sweet mini peppers, a little icing sugar and water, plus some sugar eyeballs. We'll need to mix up a little icing to pipe onto the peppers so you'll need a piping bag or tube. This will act like glue to stick the sugar eyes on with. It's also important to make the icing nice and thick or the eyes will slip off if it's runny. Also, we will chill the peppers once we have added the icing, just briefly so the icing starts to set before we add on the eyeballs.
Another important note, when handling the sugar eyes, make sure your hands are dry and try to not touch the black pupils while you add them to the peppers. You don't want the black dye to smudge or run, it will ruin the look.
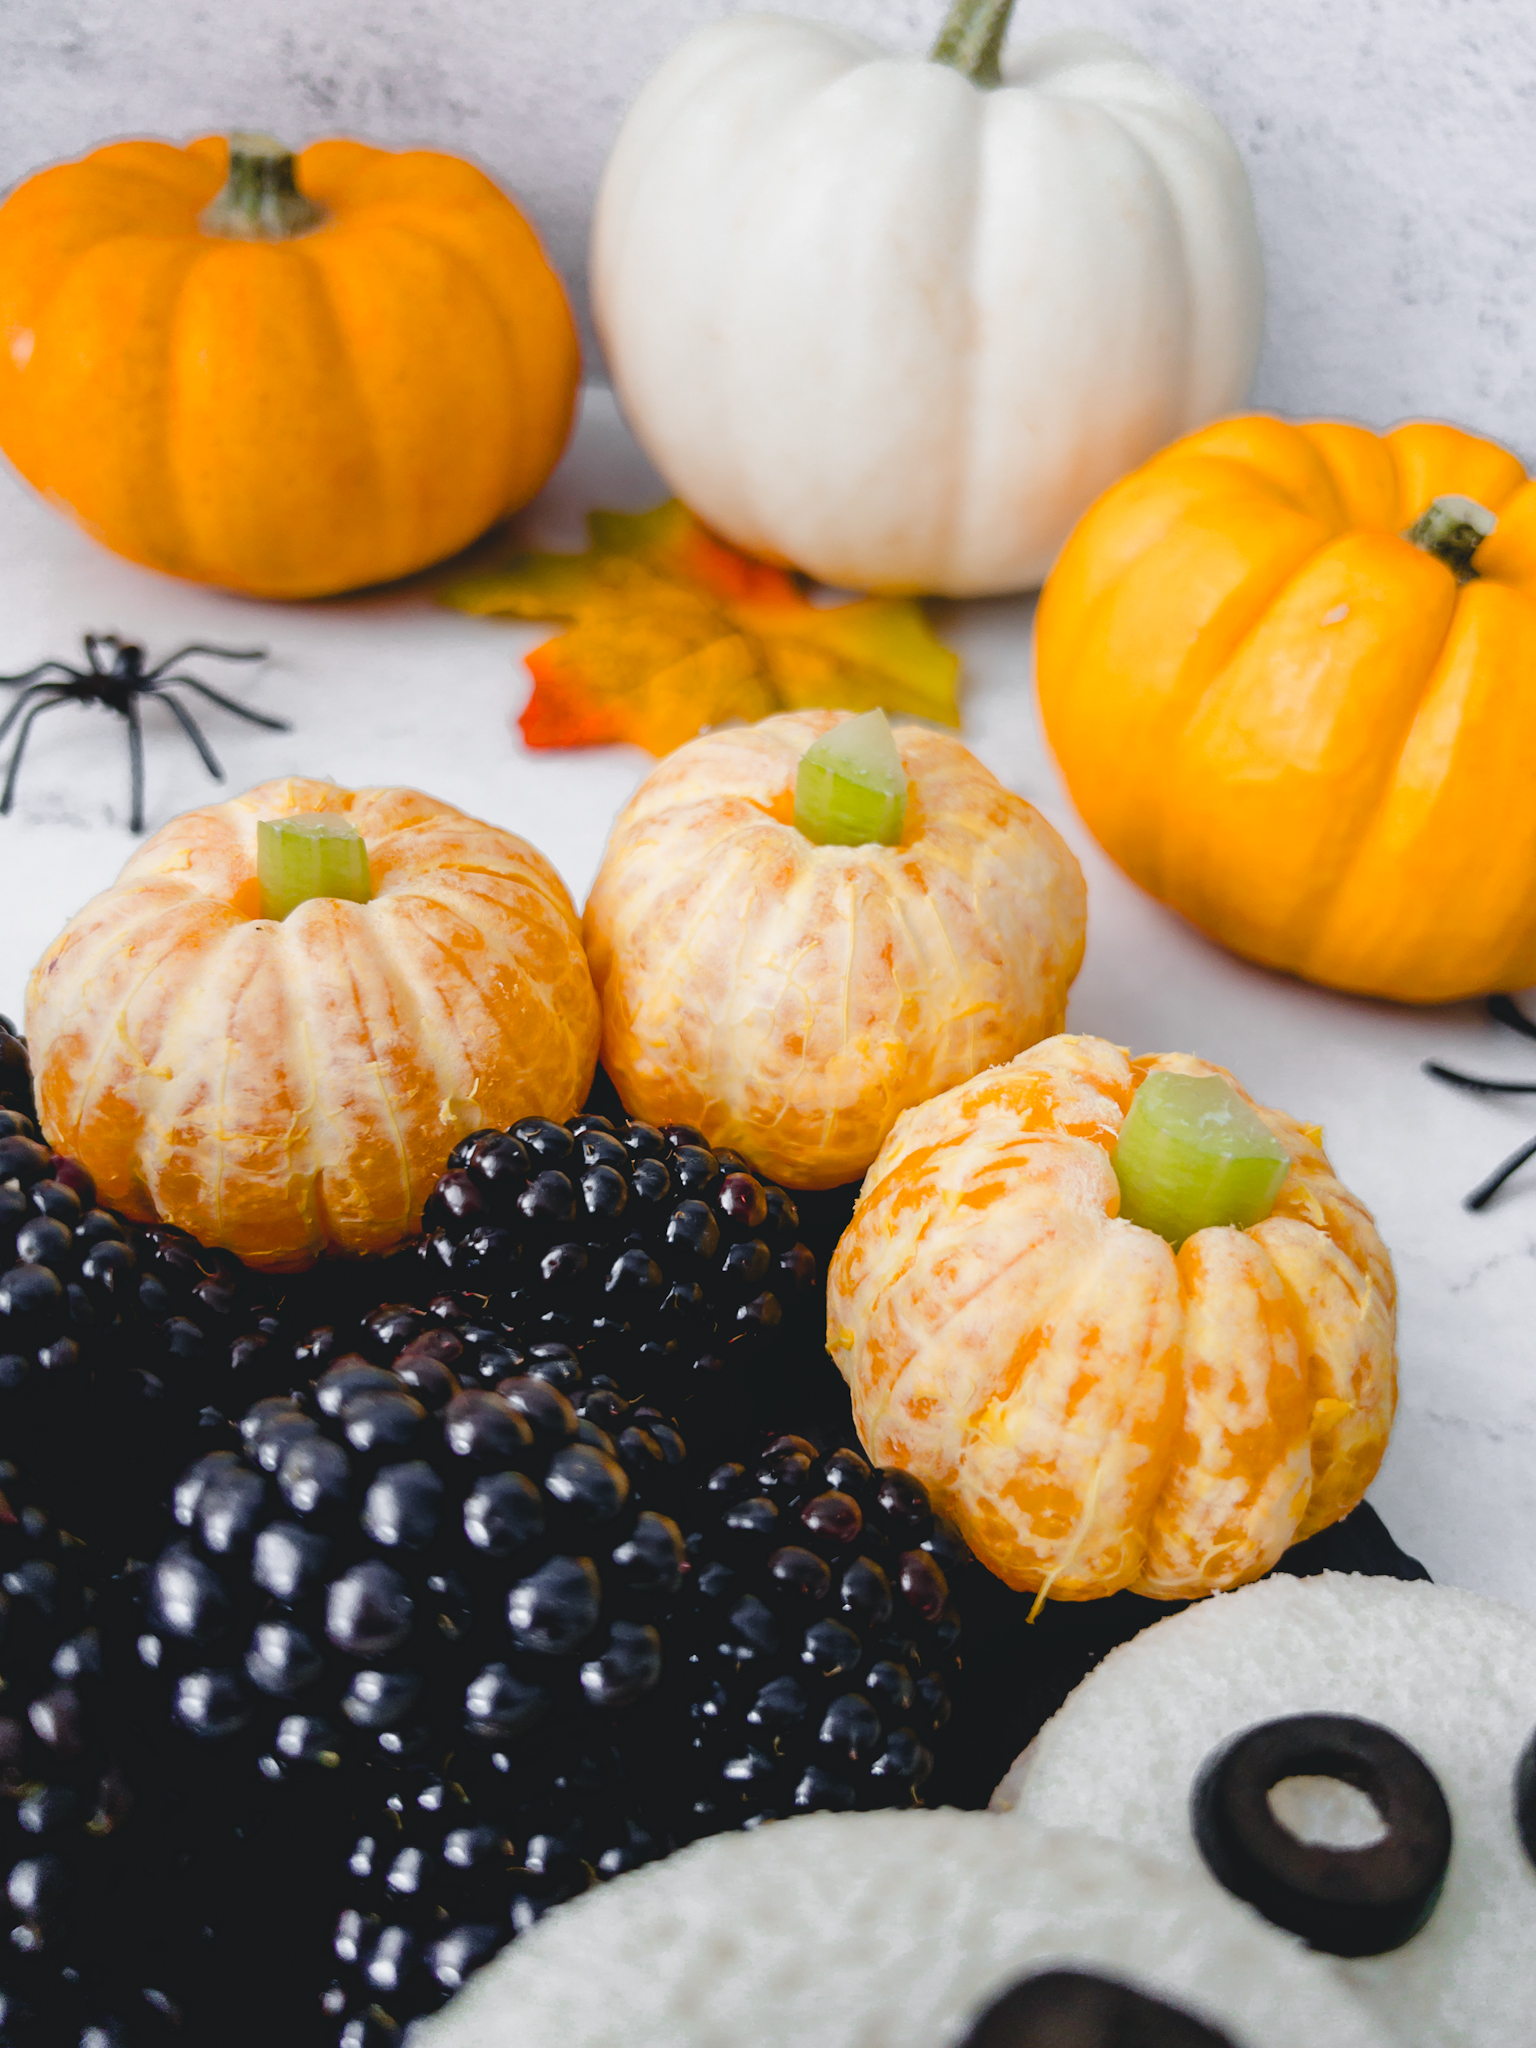
Clementine Pumpkins
This is one of my all time favourite easy Halloween snacks for kids. Just two ingredients needed, clementines and celery! I recommend making these first, then wrap in clingfilm (saran wrap) and chill until you are ready to serve.
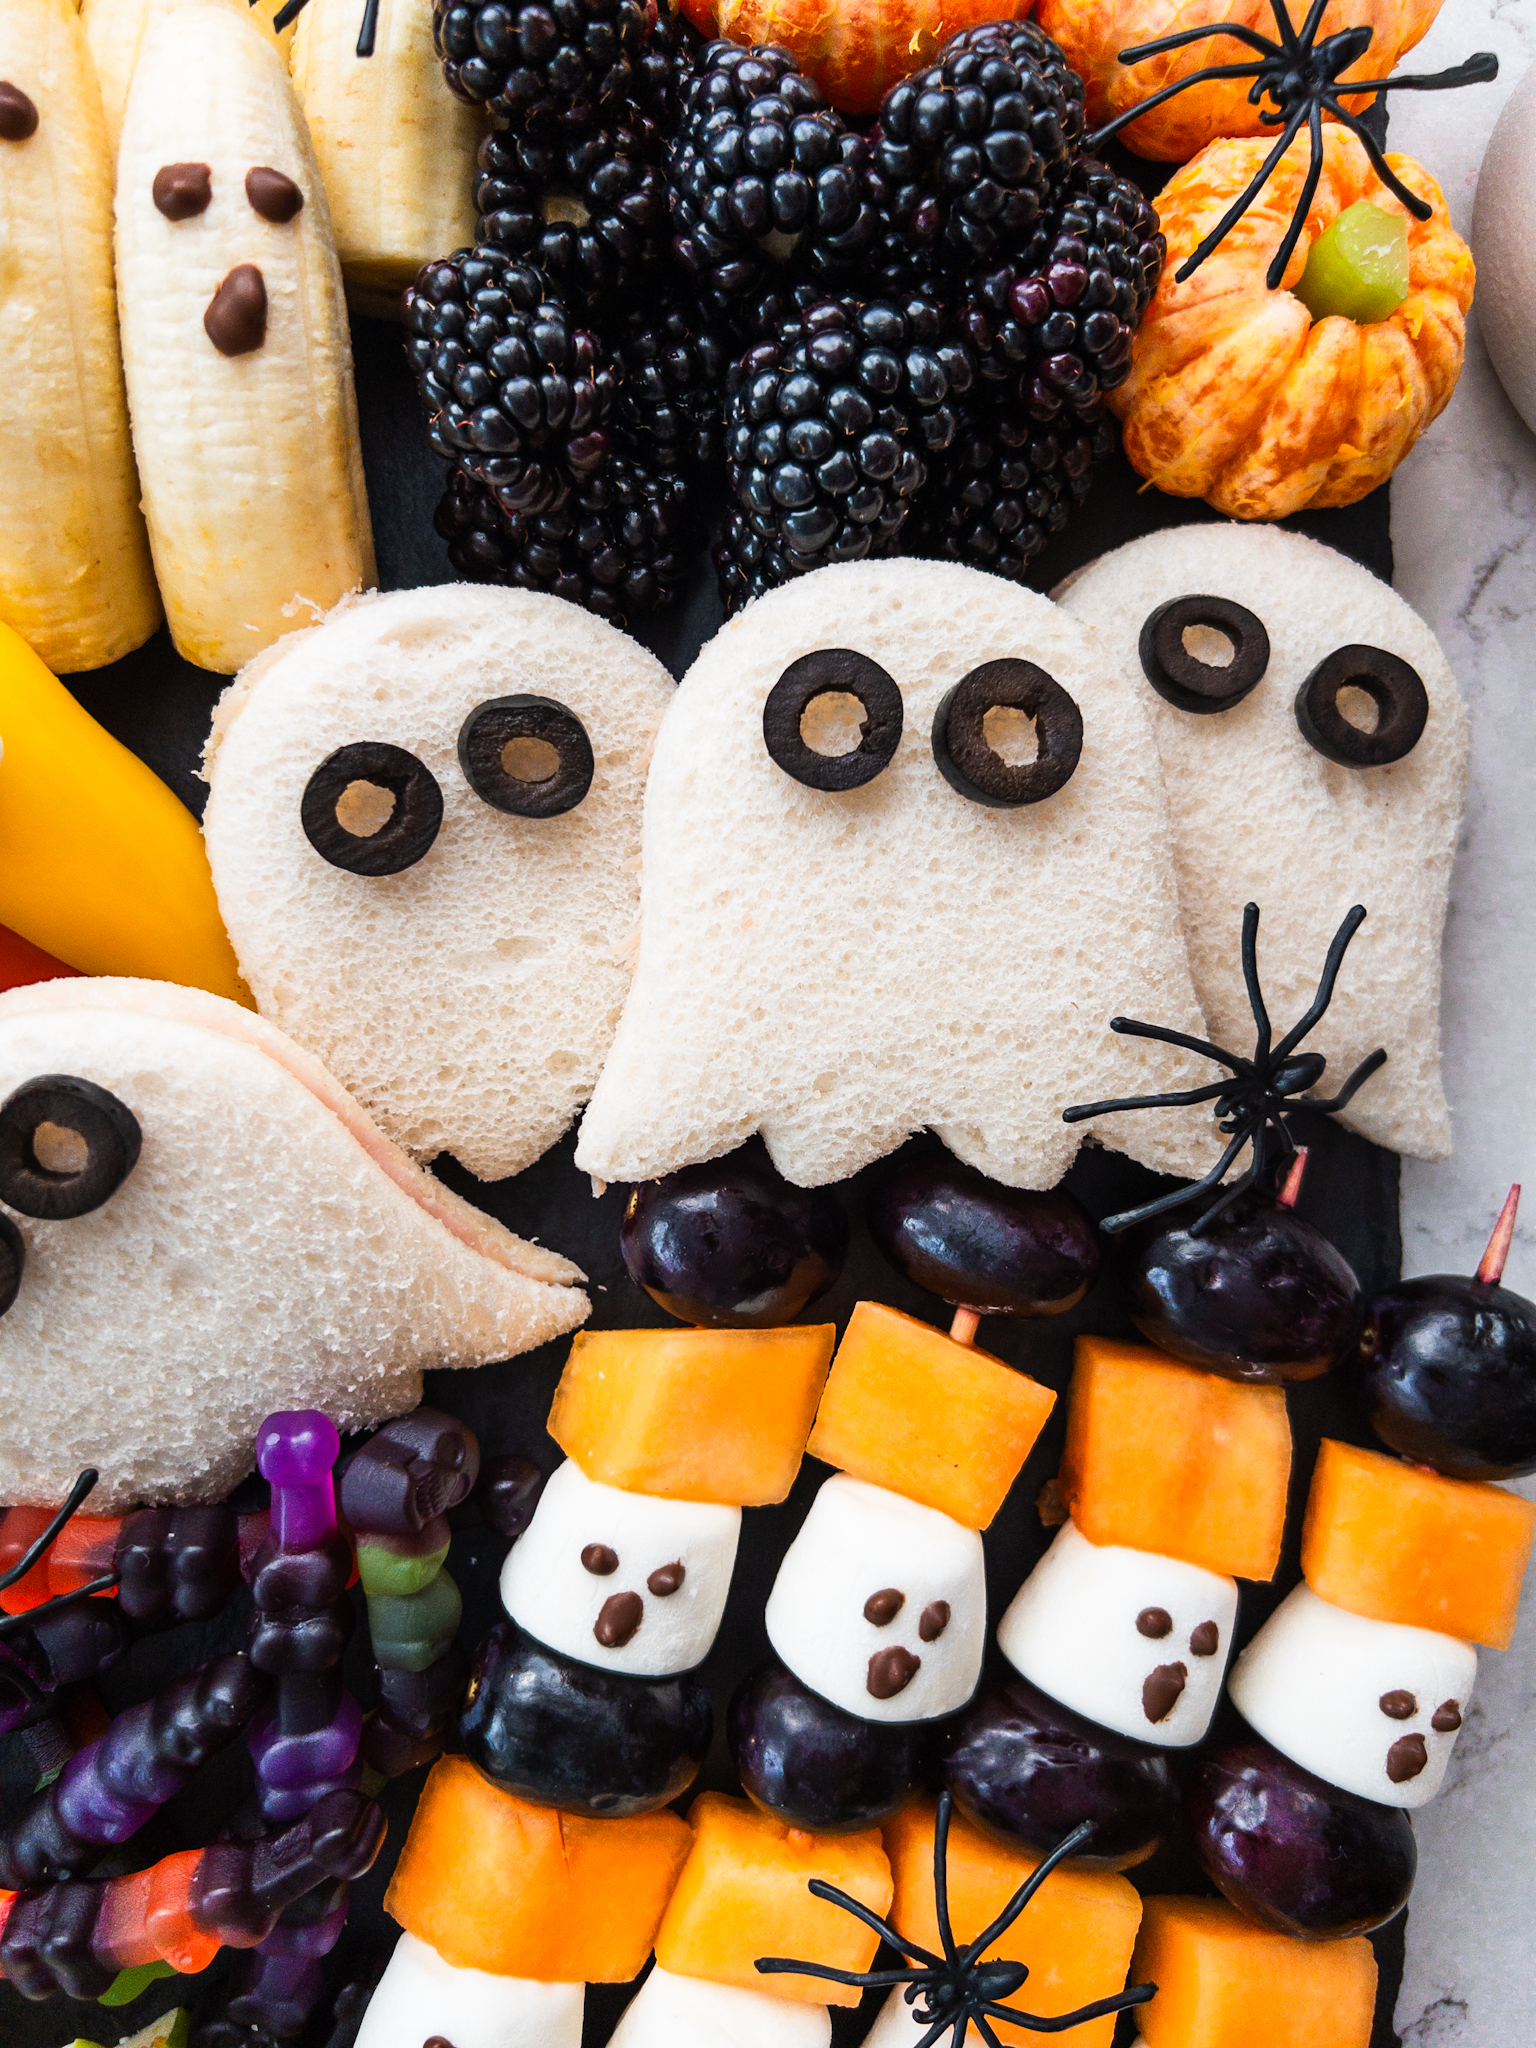
Sandwich Ghosts
These sandwich ghosts are my joint number one recommend for toddler Halloween snacks, along with the banana ghosts. Keep the filling of these simple like ham or cheese so the sandwiches stay relatively flat and so that the bread sticks to the filling. Then use a ghost cutter to cut them out, pressing down hard and wiggling the cutter around so you get a neat shape.
Then slice up some black olives to add on once you add the sandwiches to the board. If you are using jarred olives you'll need to sit them on some paper towel to dry off. If you use olives not in liquid from a packet, you can skip this step. Once sliced, add the olives to a small bowl, cover and chill. Once you've done your sandwich cutting, put the sandwiches in a resealable food bag or air-tight container and chill under ready to use.
If you don't have a ghost cutter but have another Halloween shape cutter you'd like to use, by all means do that.
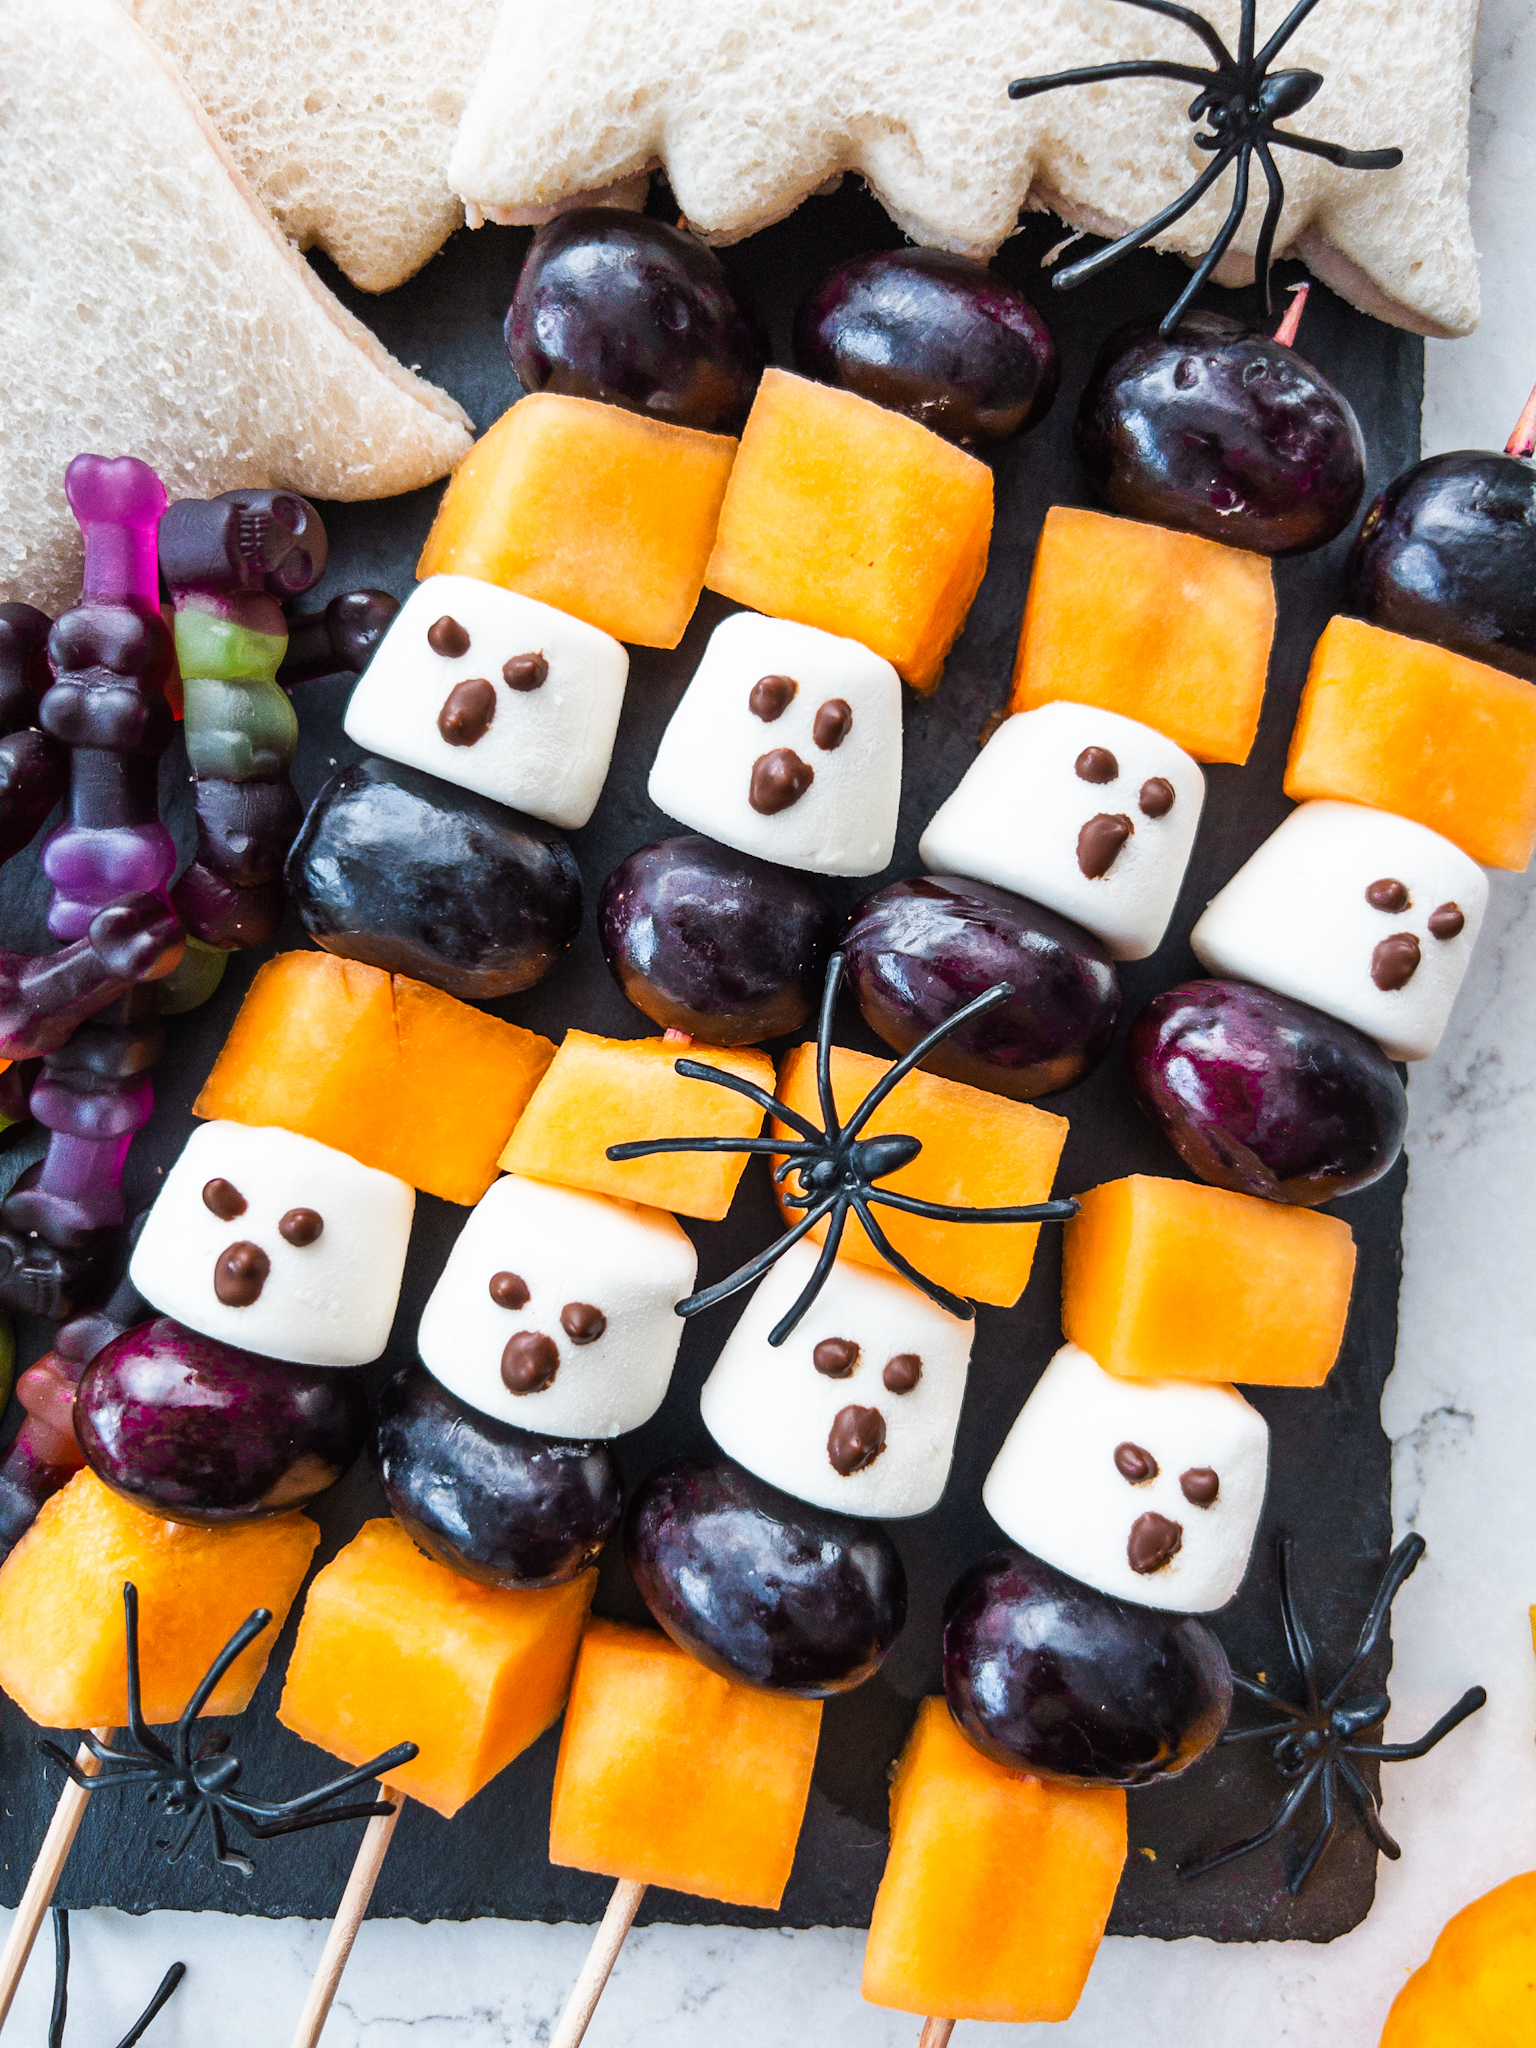
Fruit & Marshmallow Skewers
This one is my kids favourite, and so is my highest recommended of all Halloween treat ideas for kids. And I say treat, but it's still a balanced one because of the fruit. For these you will need skewers, a cantaloupe melon, black grapes, white marshmallows, some dark chocolate chips and a cake writing pen or piping bag. Just melt the chocolate chips in a bowl in the microwave and pour it into the cake pen or icing bag, and snip off just the very tip.
When you prepare the melon, you'll need to dice it into roughly 1 inch cubes as best you can. Then you will just alternate the melon, grapes and marshmallows as you thread everything onto the skewers. Then carefully draw faces onto the marshmallows with the chocolate pen. I went for scream-style ghost faces but you can do any face you like. Then the best thing to do is lay them to a baking tray or small chopping board and allow the chocolate to set. At this point, if you aren't ready to compile your board, you can then lie over some clingfilm (saran wrap) and carefully transfer them.

Bananas Ghosts
These banana ghosts are my joint number one recommend for toddler Halloween snacks, along with the ghost sandwiches. All you need to make these are bananas, some dark chocolate chips and a cake writing pen or piping bag. Just melt some chocolate chips in a bowl in the microwave and pour it into the cake pen or the icing bag, snipping off just the very tip.
You will want to make these Banana Ghosts close to serving time so they don't go brown, but allow some time for the chocolate to set - if you do these before the apple mouths then that will be enough time.
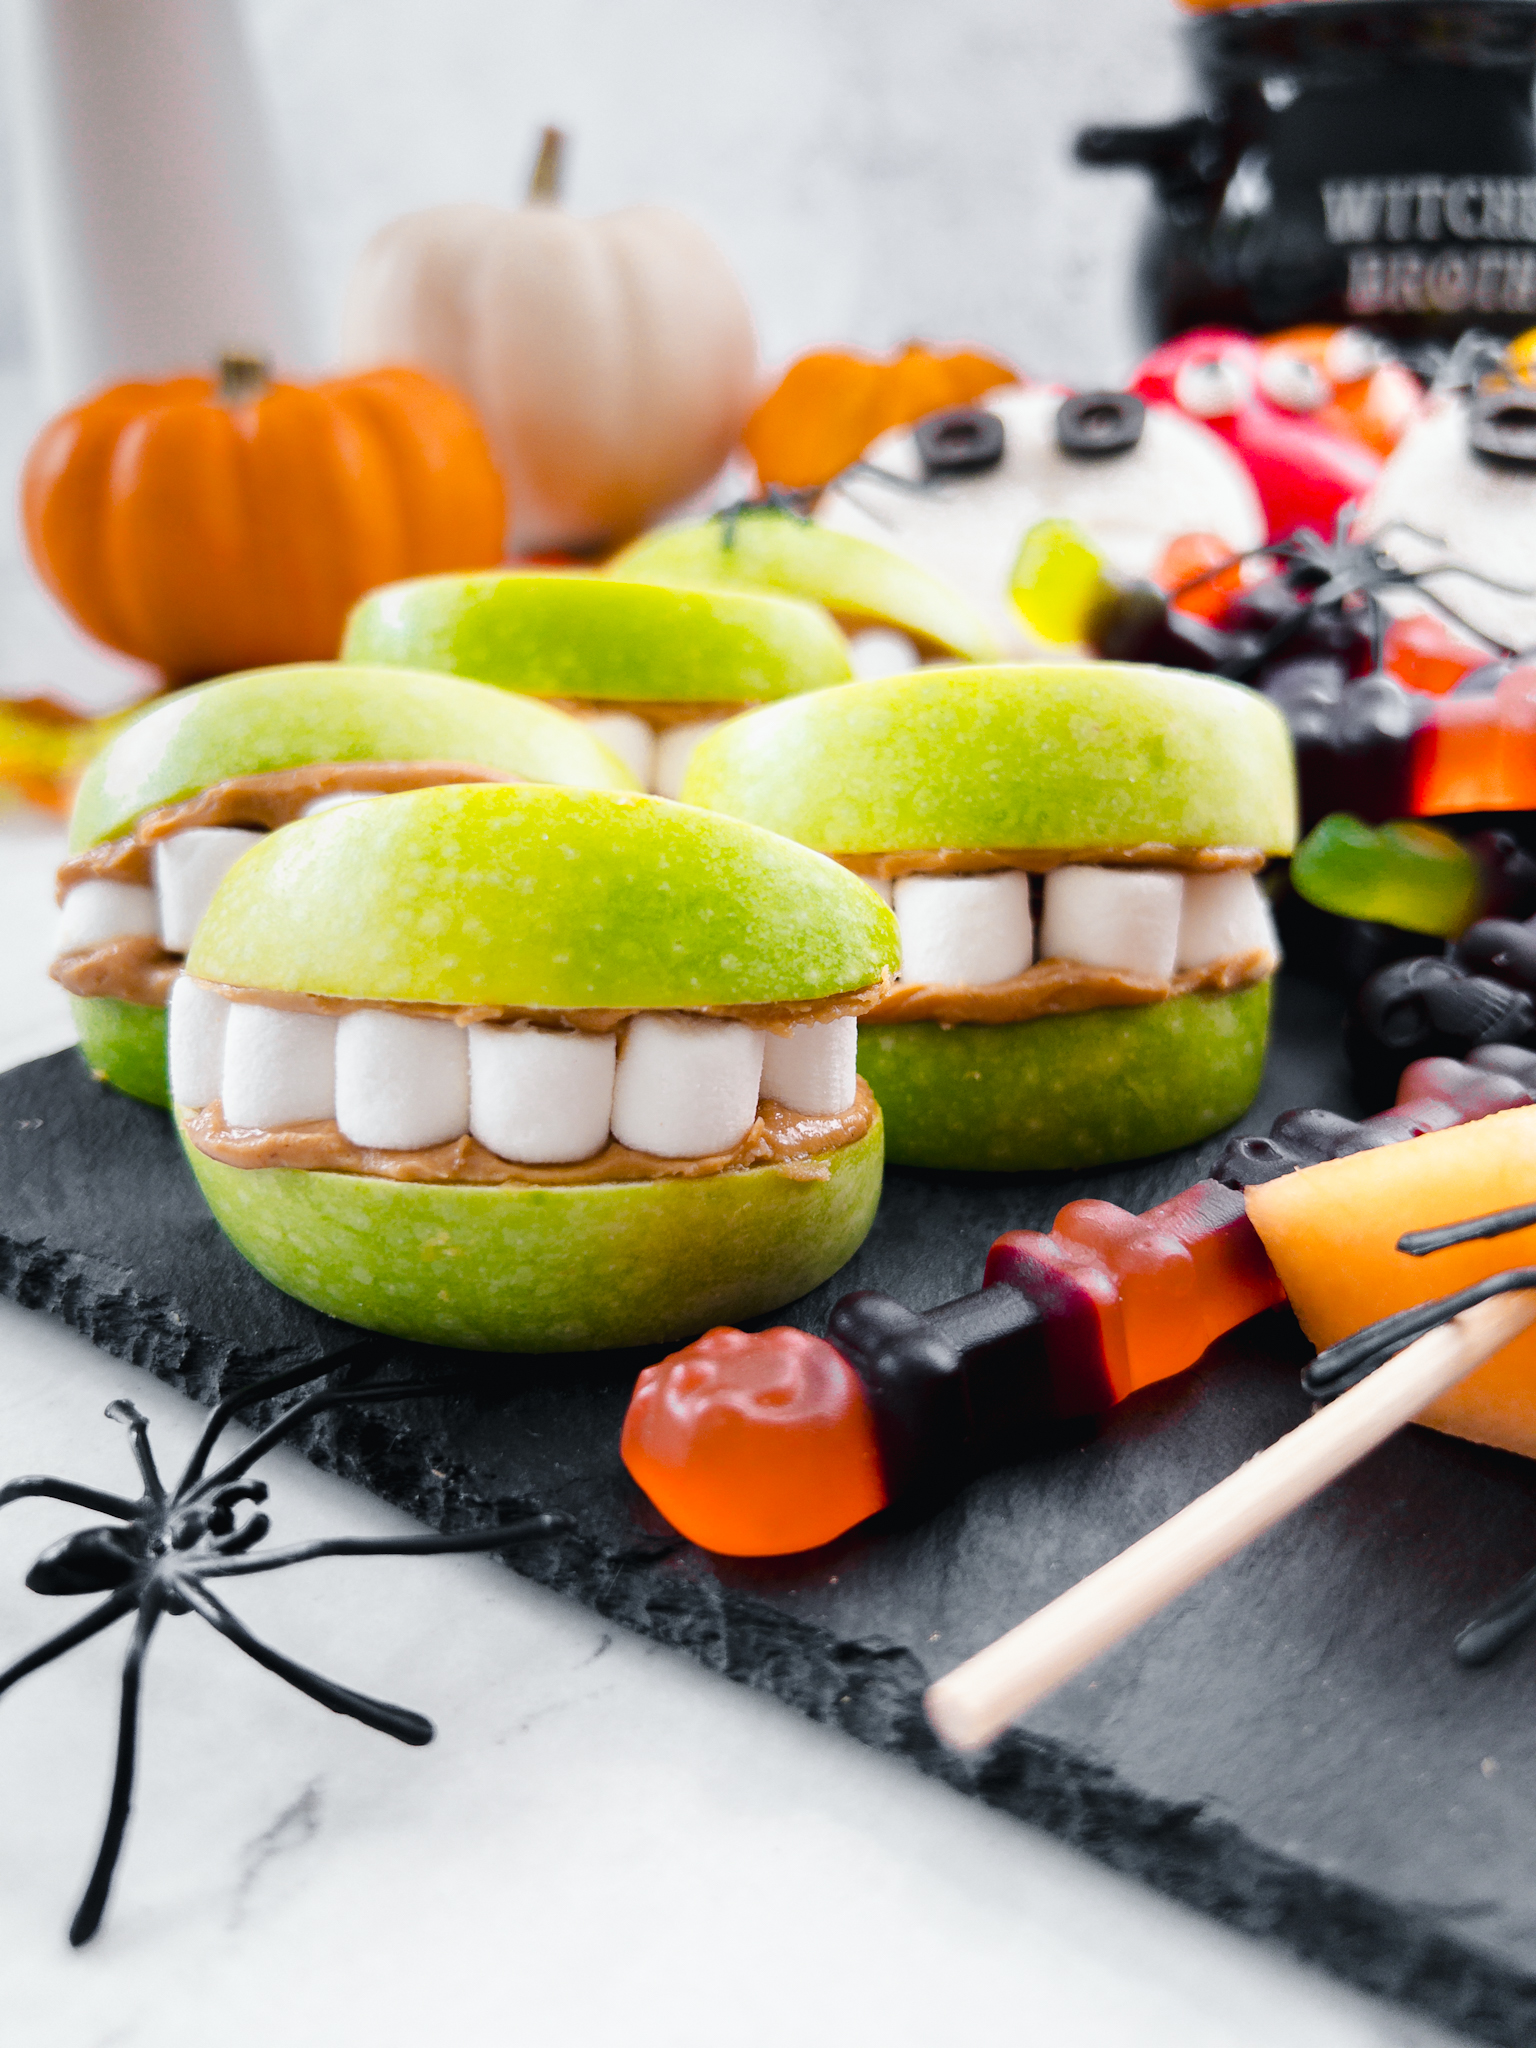
Zombie Apple Mouths
For these zombie mouths you will need 1-2 apples, white mini marshmallows and some thick, smooth thick peanut butter like Sun-Pat. If you use an oily runnier peanut butter the apple and teeth combo just won't hold and the peanut butter will run down the teeth and ruin the look. And because apple will start to turn to brown once cut, make these apple mouths last.
Other Extras for my Halloween Snack Board for Kids
Then we are going to add on some shop-bought snacks:
- Orange cheesy crisps, I've gone for cheese balls
- A dark berry, I went for blackberries but blueberries would work too
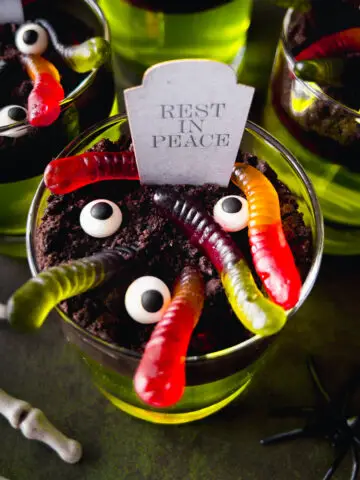
- A Halloween-themed chocolate or sweet, I went for gummy snakes
You Might also Like…

Kids Help Too
You can either put this together for the kids as a surprise, or let them help you create it which I'm sure they will have a lot of fun doing.
Sharing my Halloween Snack Board with Babies
If you want your little one to share in the snack board, especially if you are creating it for older siblings, ensure you serve anything you give them cut appropriately for their age. Solid Starts is a great website where you can search for each type of relevant food and see how to serve it for each baby stage and age.
Storing my Halloween Snack Board Leftovers
Of the snacks you've made, really the only leftovers that will be good to keep for a longer period of time are the mini sweet peppers. The fruit and marshmallow skewers will be fine the next day if stored in a resealable food bag or air-tight container in the fridge.
For more on safe food storage and reheating read here >
Diet Details
This Halloween Snack Board is egg-free. You can of course, pick and choose snack elements that suit your preference and diet.
Together to Eat is reader-supported. I may earn a small commission from anything bought through links found here.
Halloween Snack Board for Kids
Special Equipment
- Knife + chopping board
- Piping bag + scissors or cake writing pen
- A plate
- Table knife
- Paper towel
- Clingfilm + resealable food bags / air-tight food storage containers
- Slate platter or large wooden chopping board / tray
Ingredients
CLEMENTINE PUMPKINS
- A few clementines
- A celery stick
MINI SWEET PEPPER GHOSTS
- Pack of sweet mini peppers
- 70 g icing sugar / ½ cup
- 2 ½ teaspoons cold water
- Edible sugar eyeballs
FRUIT & MARSHMALLOW SKEWERS
- Cantaloupe melon
- Black grapes
- White marshmallows
- Dark chocolate chips
SANDWICH GHOSTS
- White bread
- Simple filling of choice
- Black olives
BANANA GHOSTS
- Bananas not too ripe
- Dark chocolate chips
ZOMBIE APPLE MOUTHS
- 1-2 green or red apples
- Smooth thick peanut butter not oily and runny
- White mini marshmallows
EXTRAS
- Orange cheesy crisps
- Blackberries or blueberries
- Halloween chocolates or sweets
- Plastic spiders for decoration only, optional
Instructions
CLEMENTINE PUMPKINS
- Slice a stick of celery lengthways into 4. Then cut horizontally into about 1 ½ - 2 inch sticks. Peel the clementines and for each one take a celery stick and push it into the hole in the middle, leaving just a little poking out of the top of the clementine like a pumpkin stalk. Wrap carefully in clingfilm (saran wrap) and chill until ready to compile your board.
MINI SWEET PEPPER GHOSTS
- Mix your icing in a small bowl. Once it's smooth and thick, scoop it up on spoon and add carefully to the bottom of a piping bag (near the tip of the bag). Use your hand and squeeze the icing off the spoon and into the bag. Then using scissors, snip just the very tip of the pointed end of the piping bag. You want the hole to be small. Then lay your mini peppers on a plate, flattest side facing up. Add two dots of icing onto each pepper where you want the sugar eyes to go. Then carefully transfer the plate to the fridge and chill for 10 minutes, so the icing starts to set. Then remove carefully and add the sugar eyes onto the icing dots. Make sure your hands are dry and try not to touch the black pupils or they could smudge. These can go back into the fridge until ready to serve.
FRUIT & MARSHMALLOW SKEWERS
- Halve the melon and discard the seeds. Cut into 1 inch wide slices. Then cut the peel off. Chop into roughly 1 inch cubes. Then feed onto your skewers a melon cube, followed by a black grape, followed by a marshmallow and so on. Then melt some chocolate chips in a small bowl in the microwave, in 10 second bursts, stirring in between each go. Add the melted chocolate to a piping bag or a cake writing pen. If using a piping bag, snip off just the very tip once you've added the melted chocolate. Draw faces onto the marshmallows immediately. Allow the chocolate to set and then you can cover with clingfilm (saran wrap) or store in a large air-tight container and chill until ready to serve.
SANDWICH GHOSTS
- Make simple sandwiches like cheese or ham. Lay your ghost cutter in the middle of the sandwich and press down hard, wiggling the cutter around to achieve a neat cut. Transfer to a resealable food bag or air-tight container and chill to keep fresh. Then slice a few olives, discarding the ends as the holes won't be big enough for the eyes. If they have been in liquid, leave them to dry off on some paper towel, then add to a small bowl and chill until you are ready to build the board, and once you lay the sandwiches in place on the board you can add the olive eyes.
BANANA GHOSTS
- Make these second to last, just before you are ready to compile the board as peeled bananas will start to turn brown. Peel your bananas and cut both ends into about 2 ½ - 3 inch long pieces. Then melt some chocolate chips in a small bowl in the microwave, in 10 second bursts, stirring in between each go. Add the melted chocolate to a piping bag or a cake writing pen. If using a piping bag, snip off just the very tip once you've added the melted chocolate. Draw on a ghost/scream face to each banana ghost. Allow to set while you make your zombie mouths.
ZOMBIE APPLE MOUTHS
- Make these just before you are ready to compile the board as cut apple will slowly turn brown. Cut the apple into roughly 1 cm slices. Then spread the slices on one side with peanut butter. For each piece, wipe the apple peel and the peanut butter edge with some paper towel to clean it up. Then place the slice down peanut butter side up. Add on 5-6 mini marshmallows arranged like teeth. Then gently place on top another apple slice, peanut butter side down and on top of the marshmallows, pressing it down a little to secure it. You are now ready to start putting together your board.
COMPILE THE BOARD
- Watch my video below or use the first picture in the blog post to guide you on the best way to arrange the snacks on a rectangular board. Add plastic spiders last if using.
Notes
STORAGE
They mini sweet peppers leftovers can be stored for about a week in the fridge. The fruit and marshmallow skewers will be fine the next day if stored in a resealable food bag or air-tight container in the fridge.

Traci says
Now THIS is cool! Glad the pic popped up in my google images.
togethertoeat says
Awww thanks so much for leaving feedback, really appreciate it! My two loved this snack board so much 🥰